How To Defend Well6
An Attacker's Picnic
Well6 is undoubtedly one of the hardest maps to defend and can be quite a nightmare if you're unorganised. However the bases are quite far apart, and they key return time is short, so if your key is displaced, you have every chance to prevent the cap. It is a map that if the key is out in a quite precarious position, it's vital that the defence shuffles around to cover it. Many clans often pull back their offence to defend in close games when the key reaches the ramp room or the front of the base. However with a lot of practice, and a decent strategy (such as the one below), your key may never even leave your flag room.
Lift Soldier #1 |
Lift Soldier #2 |
Water Soldier |
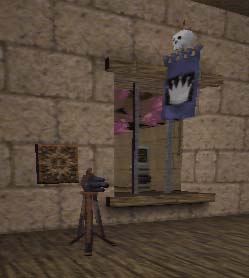
Flag Room Engineer
| |
If the rest of the defence is not up to scratch, this can be one of the most frustrating positions to play. But if the rest of the defence is solid, it�s very rewarding. The engineer should build his gun in one of two positions. Either to the left of the grated window (just in front of the button) or to the right of the grated window. This sentry is really a last resort, and is easily destroyed by any heavy classes who make their way up top. However it is sufficient to stop scouts/medics, and is an essential part of the defence.
The dispenser should be built on the outside of the grated window, allowing the window to be closed. This blocks off the window, meaning anyone who gets the key must escape through the back entrance, giving the defence a lot more time to respond if the flag is taken.
Once the sentry and dispenser are in place, if the rest of the defence is set, the engineer may choose to attack or roam the base entrance. Loitering around the flag area will only make the defence more vulnerable to spy attacks and impede your soldiers and snipers.
Media: Building The Dispenser [demo]
Attic Demoman |
Media:
Demo Of Attic Demo [75kb qwd]