COMPILING YOUR MODEL...
A brief explanantion of how a HalfLife model compiles before we start:
Half Life uses MDL files for player models in the game. Whilst HalfLife
apparently uses the Quake1 engine, the MDL files are not at all like the the
Quake1 versions. Each model MDL file contains a reference frame, the skin (or
skins) and all necessary animation files.
The way it works is like this: You create your model mesh and skin it. You then
attach your mesh to the Biped skeleton using 'physique'. What this does is tell
the game which vertex in the mesh is controlled by which bone (We did all this
in the previous tutorials). Therefore, in the game the skeleton controls the
mesh . That means that the animation frames do not contain your mesh, they are
skeletal animations. What this means is that if you use the standard Valve
animations, the only thing you need to make yourself is your mesh and attach it
to the Biped.
All animation files and your biped-ed mesh are exported from Studio MAX as SMD
files using the Valve Studio MAX exporter plugin called smdlexp.dle which you
can get from the Valve toolkit on Wavelength.
The standard Valve skeletal animations are also available ready-exported as SMDs
in the Valve full SDK which, again, is available from Wavelength.
The whole lot: Skins and SMDs are then compiled into an MDL using Valve's
Studiomdl.exe program (also part of the Valve tool kit available from Wavelength).
EXPORTING YOUR MESH
First and most important is to make sure that the smdlexp.dle
file is in your Plugin folder in your Studio MAX folder.
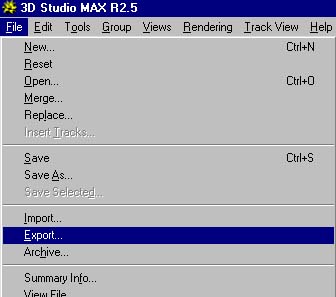
Now open your model. Be sure that you are happy with it's skin and also the
assignment of the vertexes to the Biped skeleton. Now select 'Export' from the
'File' drop-down menu.
Now where it says "3D Studio (*.3DS)" open the selection menu and
select "Valve SMD (*.SMD)" - NOTE: This will not be listed if
smdlexp.dle is not in your plugins folder.
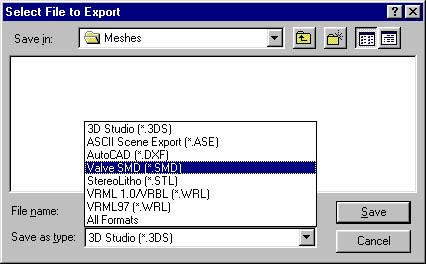
Now in the 'File name' slot type the name of your model (ie: my_model.smd),
decide where you want to save it and click 'Save'
You will now be presented with an option box, asking you if this is a skeletal
animation or reference frame. You will see that the Skeletal animation radio box
is checked. Check the reference box instead, as in my example here:

and click OK.
You have now exported your model as an SMD reference file. We're almost there.
EDITING THE QC FILES
Okay, let me first make a disclaimer. What follows is a brief disection of the
main QC file that you need to compile your SMD file and the animation SMD files
into an MDL. Now I need to make it clear here and now, that I am NOT a
programmer. I don't completely understand what all the elements of the QC file
mean. However I have made wild guesses based on experimentation. If there is
anyone who can put me straight on this, then please let me know.
Okay then, let's proceed.
Another basic explanantion. To compile your SMDs into MDLs, you need to run the
Studiomdl.exe program. This program uses two QC files. Firstly the
player-specific file which is the one we are about to disect. Secondly the 'player_shared.qc'
which I'll explain later.
You need to be able to edit the player-specific QC file in order to compile your
model.
This is what it looks like:
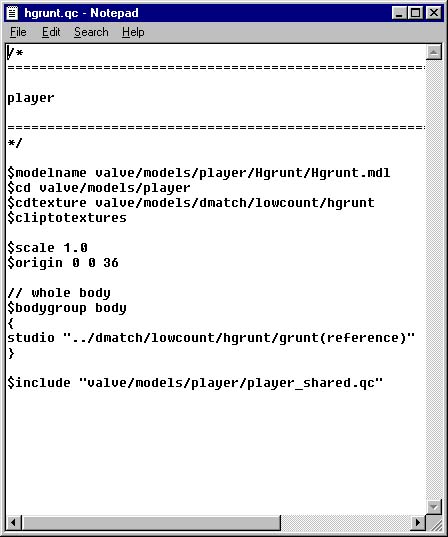
I have used the hgrunt.qc because the others have elements that I don't
understand and this one has the bare essentials required to make a Deathmatch
model. Both the Hgrunt.qc and player_shared.qc are included (amongst others) in
the Valve full SDK.
Okay, line one:
$modelname valve/models/player/Hgrunt/Hgrunt.mdl
This is telling Studiomdl.exe what your MDL file will be called and where to put
it. So you will need to change the words 'Hgrunt' to your own file name. For
example, if the model you were making was called 'Geoff' then you'd want a
geoff.mdl in the geoff folder. Thus, your line would look like this:
$modelname valve/models/player/Geoff/Geoff.mdl
NOTE: You will need to create a Geoff folder in the path: valve/models/player/
so that studiomdl.exe can actually put the compiled mdl file in there.
Next line:
$cd valve/models/player
This sets up the base folder from which Studiomdl.exe works.
$cdtexture valve/models/dmatch/lowcount/hgrunt
This is telling studiomdl where to find the skins for your MDL file. Again,
you'll need to create a Geoff (or whatever your model is called) folder in the
path valve/models/dmatch/lowcount.
$cliptotextures
I am relaibly informed by Spider that this instructs Studiomdl.exe to compile
the skin into the MDL file. Apparently there is an alternative which is, $externaltextures
that compiles the skins to seperate files. This is used primarily for monsters
and these are the MDL files with a 't' at the end such as Gmant.mdl. Deathmatch
models all use $cliptotextures so we will leave it alone.
$scale 1.0
Tells Studiomdl.exe to make the model actual scale. You don't need to change
this, but if you were to make the value 0.5 it would make the model half size
and if you were to make the value 2.0 it would make the model twice size. I've
had some fun with this, but the weapons appear unaffected so it's ultimately
useless.
$origin 0 0 36
This tells Studiomdl.exe where the models origin point or zero point is. You
don't need to change this.
// whole body
$bodygroup body
These two are used together. It tells Studiomdl.exe that the model is one single
element. It is possible for models to have seperate elements however Deathmatch
models use only one so we will leave this.
studio "../dmatch/lowcount/hgrunt/grunt(reference)"
This is telling Studiomdl.exe where to find your reference SMD file and what
it's called. Now this should be in the same place as the skins, so the path
needs to be the same as earlier. For example, again, for argument sake, our
model is called Geoff. So you need it to point to the Geoff.smd. You also need
to have a Geoff folder in the path. So your line might look like this:
studio "../dmatch/lowcount/geoff/geoff"
note I have deleted the '(reference)' from the end of the line. This was part of
the name of the hgrunt reference SMD and not part of the code.
The final line:
$include "valve/models/player/player_shared.qc"
This is telling studiomdl.exe to now switch to the player_shared.qc file in the
path: valve/models/player/
So you need to make sure it is in that path. The 'player_shared.qc' is a list of
the deathmatch player animation sequences. It tells studiomdl.exe which
animation smd's to use to create which animation sequences. It also renames
biped bones to the way the game uses them amongst other things. You do not need
to alter this file at all, so I won't bother studying it here.
Your edited QC file should now look like this:
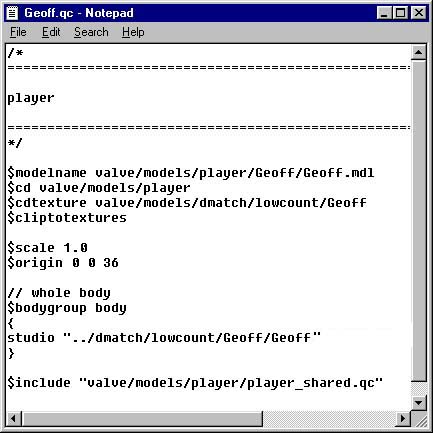
Now save it as 'Geoff.qc' Or whatever your model is called. Remember I'm just
using 'Geoff' as an example.
Okay, To compile the whole thing you need to have the following in place:
- studiomdl.exe in your Sierra/Half-life folder
- the QC file you just made in the Sierra/Half-Life
folder
- the player_shared.qc file in the Sierra/half-life/valve/models/player
folder.
- the 106 valve animation SMD files in the Sierra/Half-Life/Valve/Models/Player
folder
- a folder in the Sierra/Half-Life/Valve/Models/Player
folder with the same name as your model. For example a 'Geoff' folder.
- a folder in the path Sierra/Half-life/Valve/models/DMatch/Lowcount
with the same name as your model. For example a 'Geoff' folder. This folder
must have your skin or skins (8-bit 255 colour) and and your reference SMD
file. For example, 'Geoff.smd'
You are now ready to compile
COMPILING
It is apparently possible to simply drag your qc file on to the
studiomdl.exe icon and off it goes. Alternatively you can use the 'run'
command from the 'start' bar and type studiomdl.exe Geoff.qc and off it goes.
However, I found that if there were any errors, the DOS screen flashed on
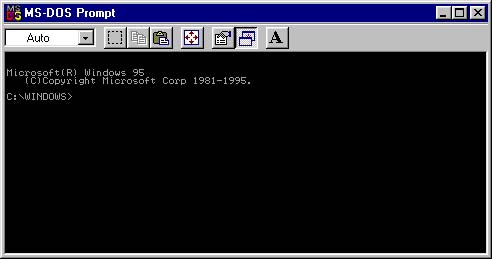
and off the screen so fast that I couldn't read the damn thing. SO I go
straight to the DOS screen which you can find by clicking 'Start', then 'Programs'
and selecting 'MS Dos Prompt' which gives you this screen.
If your Half-life folder is on a different drive to the C: drive then you'll
need to switch to it first. Type the letter of the drive which your Sierra/Half-life
folder is on followed by a colon. For example if it is on the D drive, type:
D:
Go to the folder that you placed Studiomdl.exe in.
If you followed my instructions then it should be in the Half-life folder.
So type this:
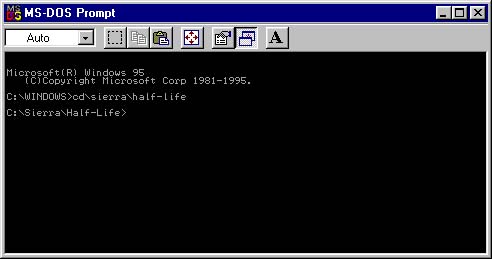
cd\sierra\half-life
Your Dos Screen should now look like this:
Finally type:
studiomdl.exe geoff.qc
Remember that I only use Geoff.qc as an example. You would type the name of
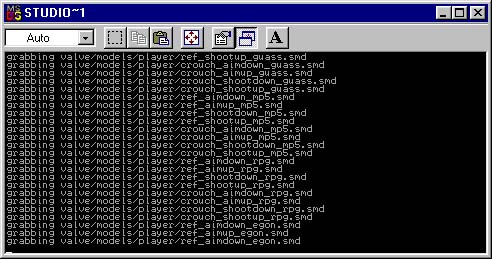
your model. If everything is as it should be, Studiomdl.exe will start 'grabbing'
animations and compiling your model. You will get a stream of commands.
Rather like this:
Finally the whole thing should be written into an MDL file and the DOS
scroll should come to an abrupt halt and look like this:
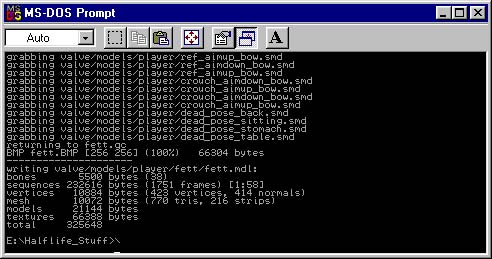
NOTE: notice I have used the fett.qc to run the example. In yours, wherever
the word fett is on the screen, it will be replaced with the name of your
model. Also, notice at the bottom, the directory is E:Halflife_stuff. This
is simply the way I have set things up on my hard drive. Yours will be
different.
THAT'S IT!!!!
Your model is compiled. You should now have a working MDL file in the folder
you created for your model in the Sierra/Half-Life/Valve/Models/Player
folder.
Tutorial created by Scarecrow,
THANK YOU !!!
©
http://www.Planetfortress.com/TF2Models
TF2 is trademark of Valve
Software and of Sierra Online.
© 2000 TF2 MODELS - Hosted by Planetfortress
Web designer/Webmaster : IXNAY