MILKSHAPE SKELETON APPLICATION
BIPEDS
SELETONS IN HALF-LIFE
...a brief overview
PLEASE NOTE: IT IS ONLY POSSIBLE TO FOLLOW THIS TUTORIAL
IF YOU HAVE MILKSHAPE 1.1.0 BETA OR BETTER
What are Skeletons? Well, if the triangles and vertexes of your model are the
flesh, then the Skeleton is, quite literally the skeleton. Also known as
'Joints', the skeleton is used by the game to deform the mesh in realtime
instead of pre-recorded animations as with Quake2. I have found both methods
have their merits and restrictions.
How does skeleton animation work?
As you will know by now, a model is made up of a series of several hundred
triangles joined at their corners. Where they join, is a point called a vertex.
During the Vertex Assignment stage of model creation, each of those vertexes is
assigned to a specific bone (joint) in the skeleton (see 'Attaching the
Skeleton'). The skeleton is then animated and each vertex moves with it's
assigned bone and the mesh is deformed accordingly.
Half-Life is able to use the skeleton to blend between two animations aswell,
for example, it can use the legs from the 'run' animation and the upper torso
from the current weapon's shoot animation. With shooting and aiming, the game
also blends between two extreme positions, but more of that later.
Something to be aware of at this point is the fact that if you wish to deform
the skeleton to fit whatever crazy creature you've come up with, you will also
need to re-animate all 106 animation SMDs for the HalfLife model using your new
skeleton as the base. I have recieved a number of E-Mails from people asking why
their new model totally deforms and stretches when they compile it.
The explanation is thus:
A Half-Life MDL file, consists of 1 reference SMD file, 106 animation SMD files
and the model's skin texture BMP files.
The reference SMD file is the one that you make, skin, bone and export. This
tells the game which vertexes are assigned to which bone and which skin is
assigned to which triangle, and also the mapping co-ordinates of each triangle
on the skin. The animation SMDs contain ONLY the skeleton and they tell the game
where to position each bone in the skeleton for each animation. This includes
size and shape. The Valve animation SMDs use the Gordon Skeleton, so if you
create a tiny goblin creature with four arms as a reference file and then
compile it using the Valve animation SMDs, the first thing those animation SMDs
tell the game to do is stretch your model to the same size and shape as Gordon.
So, if you create an entirely new skeleton, or modify the Gordon one. you will
also need to redo all of the animations using that new skeleton.
This tutorial is designed to show you how to create a new skeleton, reshape that
skeleton to fit your new model, and add new bones to it, if you need to.
CREATING A NEW SKELETON
Whilst It is possible to make an entirely new Skeleton, it makes far more sense,
I feel to strip the skeleton out of an existing Valve SMD file. The reason I say
this is because they are very specifically structured and named in order to be
compatible with the Half-Life engine. I originally converted the Quake2 Marine
to Half Life, that was my first Half-Life model. I created an entirely new biped
and made sure it was structured and named the same as the Valve one. I compiled
the model and in the model viewer, it worked fine. Then in the game the legs
didn't move at all. No matter what I did. Then I recompiled the model using the
Biped taken from The Gordon model. It worked fine. So, even if you are planning
on creating a totally deformed Biped, I would use the Gordon Biped as a base. To
be perfectly honest, I think if you use the same skeleton to animate as you do
for the reference file, then it should work.
I have provided the Geoff SMD from the modelling file, here: GEOFF.
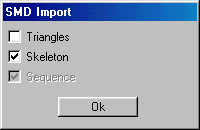
Then, when opening the SMD file, check only the Structure radiobox like so:

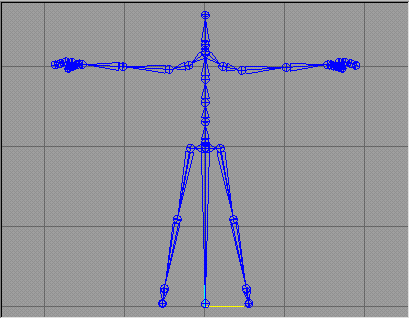
This will leave you with a standard humanoid Skeleton with the Valve structure.

NOTE: Geoff here has an enormous middle leg. We are proud of him for a moment,
then we realise that it's not that the good lord has seen fit to endow him like
a rhino, but rather this represents the link between 'Bip01' and it's source, 'steps'
Simply ignore it. It is essentially the root bone and MUST be left where it is.
Additionally, you NEVER animate this bone and you NEVER assign vertexes to it.
Provided you are happy to use the Gordon Biped as a base, we can now proceed to
adjust the size and shape of the Skeleton:
To add new bones and joints to your skeleton, or to create an entirely new
skeleton, the priniciple is the same.
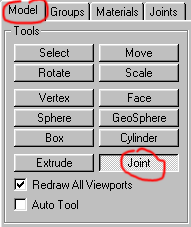
To create a new bone, go to the 'Model' tab and select the 'Joint' button:

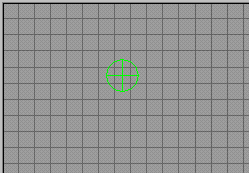
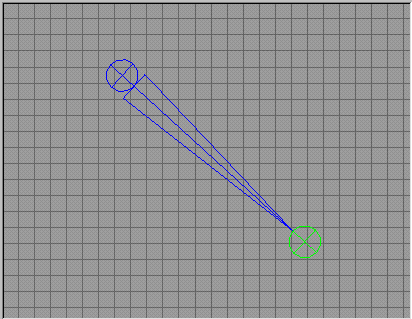
Now click in any of the 2D viewports and a green spot will appear:

Bones and Joints are usually blue. They turn green when they are selected. New
bones will be ceated, 'selected'. When you create another new bone or click
elsewhere in the viewport, the previous new bone will be deselected and turn
blue. Now click elsewhere and another green spot will appear and the two will be
joined by a blue 'bone':

You can now create a whole skeleton in the same way.
Before we continue, I need to briefly explain about the parent/child heirarchy
in linked objects such as bones.
Bones represent, essentially a chain of linked objects, no single piece can be
moved without affecting the others. However the difference being that when you
move a chain, the section you are holding moves and the rest drags behind. Not
so with bone heirarchies.
Linked objects have what is known as a parent/child relationship. The parent
bone has control over any bones linked to it. They are considered it's children.
The start of a chain , namely the 'root' bone, is the absolute parent bone. All
bone chains emenate from it and it in turn, is linked to no other object. In the
Valve Skeleton, this is 'Bip01'. The other end of the chain will be the absolute
child bone. Whilst it is linked to a parent bone of it's own, it, in turn has no
bones linked to it. Such bones in the Valve Skeleton would be the finger tips,
toes and head. Having said this, there is no one parent bone and one child bone.
Each bone that has others linked to it, is a 'parent' to those 'children' while
it, in turn can be a child to it's own parent bone. A bit like a family tree.
If you need to create a seperate bone structure from the main one, then deselect
the Joint button and make sure you deselect any selected bones. Now re-click the
'Joint' button and start creating bones again.
NOTE: Whilst it is possible to have more than one seperate skeletal structure in
Milkshape, this won't work in the game. You MUST have all bones linked
and rooting back to 'Bip01'.
More importantly, at some point, you will need to have more than one bone
eminating from the same joint, such as at the hips and neck. To do this, make
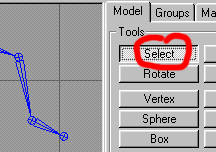
sure you have the 'Select' button active...

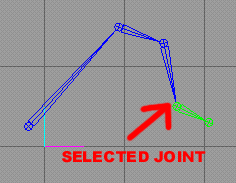
and select the bone joint that you wish to add a second bone to.

NOTE: when selecting a joint, all joints that come after it will be selected too.
These other bones are called 'children' and their parent is the bone you
selected.
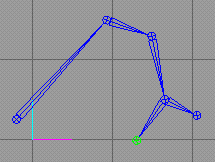
Now if you activate the 'JOINT' button and click elsewhere on the screen, a new
bone and joint will be created eminating from your selected joint:

Using this method, you can create a new skeleton, any shape you want to fit in
to your new mesh. You can also use this method to add things such as a tail or
tentacles etc etc.
One of the wonderful things that Milkshaope allows you to do which Character
Studio's Biped does not is to animate scale in the bones. It is possible to
animate movement on joints, thus stretching the section it is assigned to.
Whilst it is possible to do this with linked bones in Character Studio, it is
not possible to do it with the biped. This opens up some interesting
possibilities, not least of which are seperate moving parts on your model.
NOTE: Only two things must you take in to account, for player models, the right
hand MUST be called 'Bip01 R Hand' so the game knows where to attach the gun.
Also, the root bone, to which all others are linked, must be called 'Bip01', so
the game knows where to position the model. As a thought, the model devides at
'Bip01 Pelvis' I'm not sure if perhaps you need to have that the same name too.
To be perfectly honest, I think that even if you are intending on creating a
totally bizarre skeletal structure, I would use the Gordon skeleton as a base
anyway and deform it rather than building from scratch, there are way too many
things that could go wrong. Also, if you wish to use the Valve animation SMD
files then your skeleton MUST be named the same as the Valve one and also be the
same shape (so why not just use the Valve skeleton?).
Skeleton finished? Right. You are ready to animate.
Tutorial created by Scarecrow,
THANK YOU !!!
©
http://www.Planetfortress.com/TF2Models
TF2 is trademark of Valve
Software and of Sierra Online.
© 2000 TF2 MODELS - Hosted by Planetfortress
Web designer/Webmaster : IXNAY
