MAKING A HK MSG-90
Introduction-
This tutorial is intended for people with a
basic knowledge of 3d studio max r3 or 2.5.
For this tutorial you will need the .zip file below and thats all , it contains
the msg90 picture we are going to be using.
REQUIRED
FILES
PART 2: Making the sucker
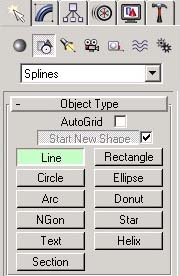
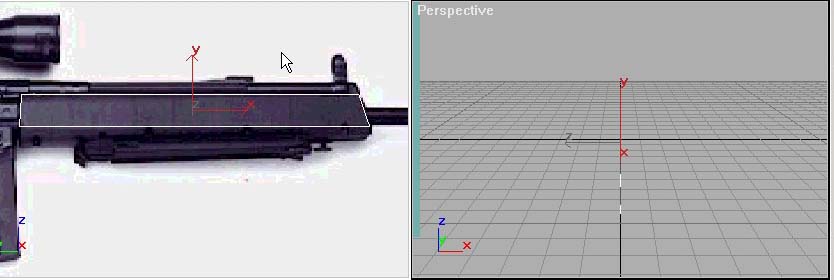
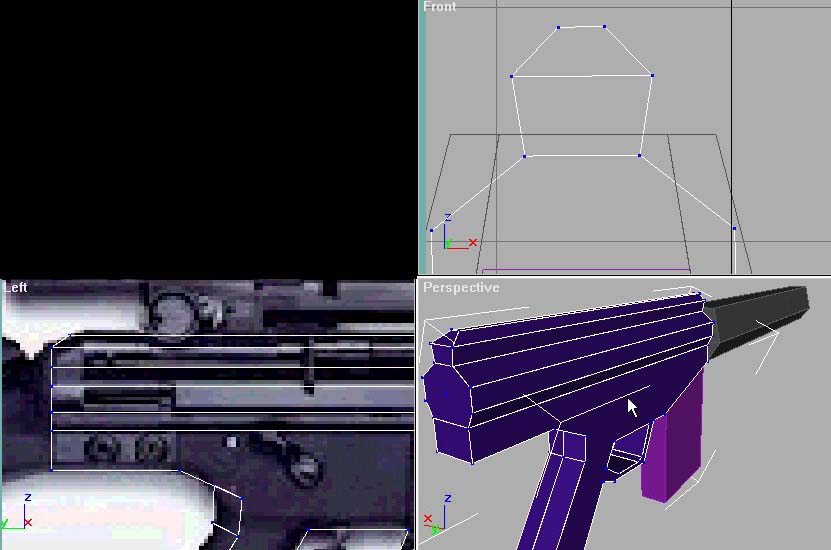
Alright lets start out by using splines , if you dont know what splines are then go to the create tab and the shapes section inside of it.
Click on line and then start to click on the
points of the foregrip you will get a drift of what it does , it should be
similar to the pic below.
Its just like drawing an outline.
Once that is done then use the EXTRUDE
modifier , if its not in your list of buttons then add it or click more and then
click extrude.
Once that is done just collapse the mesh so you can edit it again , once that is
done go to face mode and select the underneath face and extrude it down and then
pull it inwards so get the angle right on the foregrip. Then select the top 2
vertex's in the front viewport and move them in a tad too and it should look
something
like the pic below when your done.

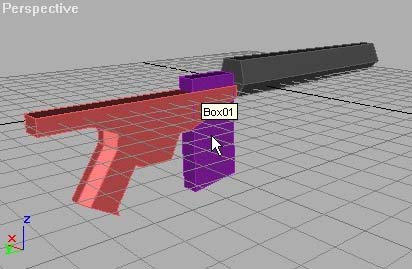
Alright once that is done then make the
magazine , that is self explanitory just use a BOX for it.
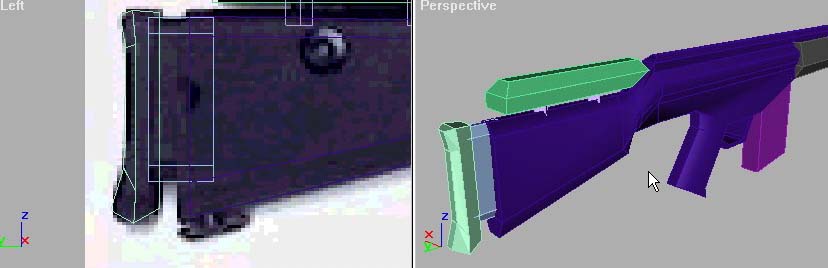
Once that is done then start to outline the lower body but leave space for the
faces that we will extrude later as shown in the handle section of the pic below.
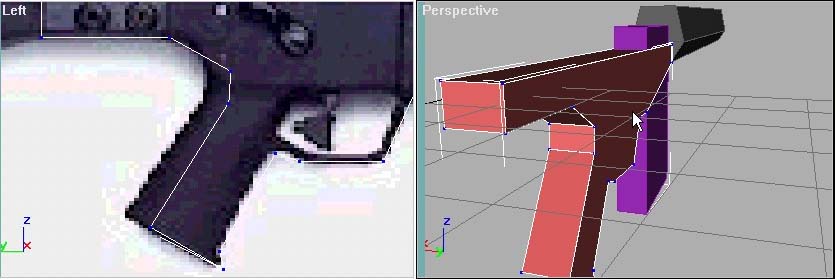
Once you have outlined it then click on the
back faces of the handle and extrude them out and then bring them inwards to get
that "CURVED LOOK".
Once that is complete it should look something similar to this
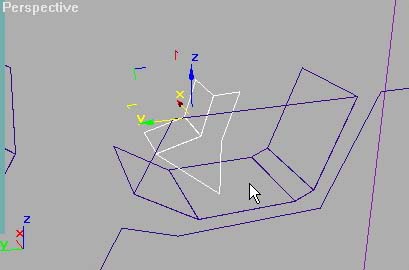
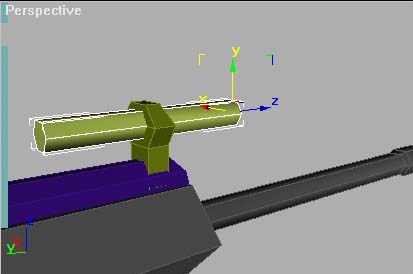
Alright , now we are going to make the
rounded section just above the lower body. So make an 8 sided cylinder in the
front viewport and make it as long as the
lower body because we are going to attach and weild it to it later , now once
its created rotate it so theres a flat section on the bottom and not pointy.
Once that is done click the attach button and then click on the lower body.
Then select the back vertex's and front vertex's that are close and weild
selected , then click on the top face and extrude it twice and try and shape it
like I have
done so in the pic below.
Now select the front 2 faces of the upper part and extrude them out to the end of the foregrip like the pic below.
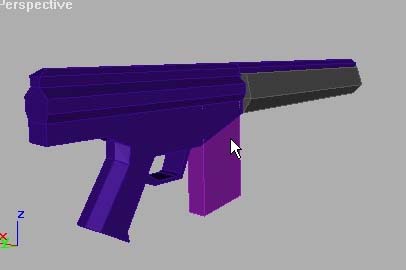
Now we are going to try and do the stock ,
this might turn out not quite like you expected so try it another way if it
doesnt ;).
Start by selecting the back faces of the main body and extrude them out a few
times around the shape of the stock. It will look weird to start with but use
the
target wield to shape it into something similar to the pic below.
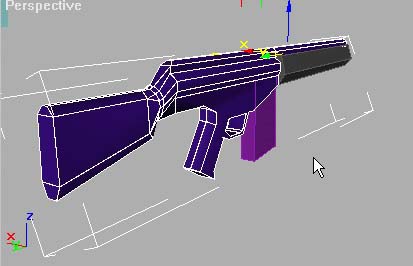
Alright now using splines again and the line
start to make an outline of the cheek rest and after that use the EXTRUDE
modifier and then select the top face
and extrude it out and then bring the top vertex's in to make it look like the
pic below.
After that is complete use a box to do the
bolts holding the cheek rest onto the stock and rotate them so the edges spike
out to the side like in the picture.
Then make the shoulder pad at the end using the same method of splines by doing
an outline then extruding it if needed.
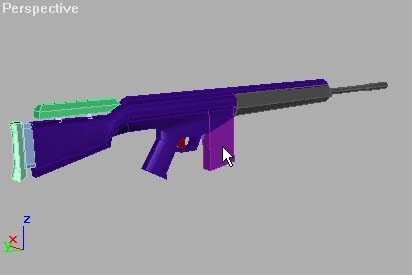
Then do the trigger and magazine release using the exact same methods as explained before.
For the barrel use a 6 sided cylinder with 3 segments and make it in the front viewport and scale the end 2 segments in the left viewport to get it looking like the pic below im sure you get what im pointing at.
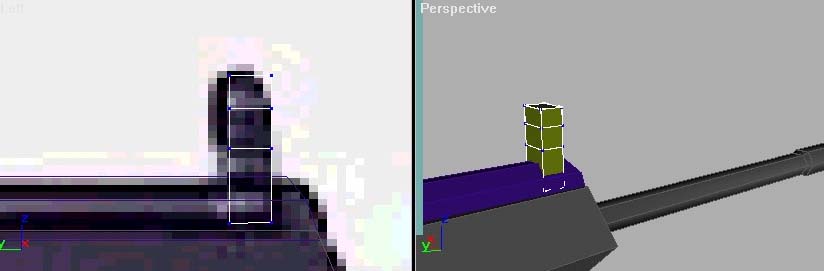
Then make the front sight by making a box in
the side viewport and extruding the top face twice then making a sort of diamond
out of it because its not going to be
close up ingame and isnt worth making more rounded , so get it looking like the
pictures.
Once you have done the general shape , make a
6 sided cylinder and make it go through the whole object , this is because we
are going to BOOLEAN it , what that
does is it cuts one object from another , so kinda punch it all the way through
then go from STANDARD PRIMITIVES in the create tab to
COMPOUND OBJECTS and then click boolean or boolean 2 and then click PICK OPERAND
and then click on the front sight , if it cut wrong then change
the option down the bar from SUBTRACT A-B to SUBTRACT B-A or vice versa.
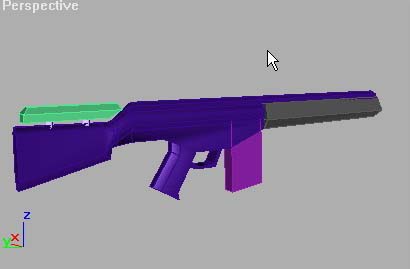
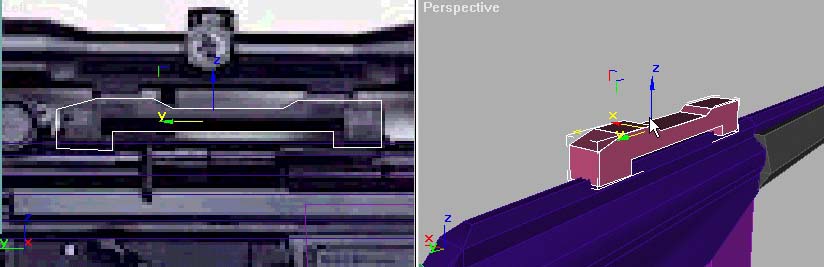
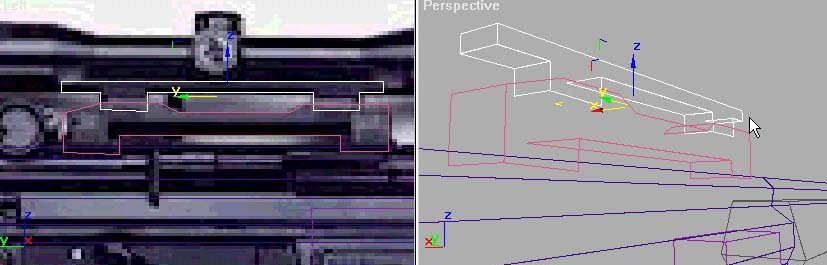
Now start doing the scope rails by using splines and getting it to look something like the pics below.
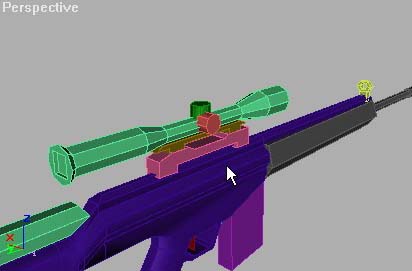
Then do the scope using a 5 segmented 8 sided
cylinder and do the knobs (wink wink) using the same thing but with only 1
segment and 8 sides.
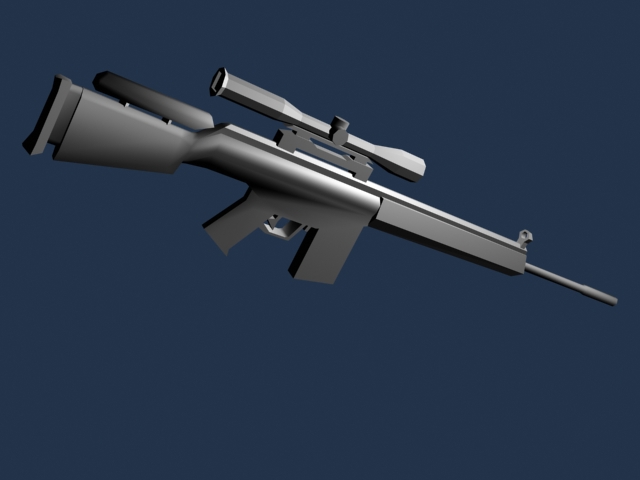
by the end it should look something like the pic below.
That about sums it up and there you have a
nice looking MSG-90 ready for skinning and at a reasonable poly count, you can
always get rid of the backfacing
or use some tricks removing the unseen faces.
You can see the finished product HERE
You can also download the finished MAX file HERE for reference. You can use this in a mod or anything you like so long as you get my permission first.
Tutorial created by Tinyfly, THANK YOU !!!
© http://www.Planetfortress.com/TF2Models
TF2 is trademark of Valve
Software and of Sierra Online.
© 2000 TF2 MODELS - Hosted by Planetfortress
Web designer/Webmaster : IXNAY