MAKING
A MAC-10
Introduction-
This tutorial is intended for people with a basic knowledge of
3d studio max r3 or 2.5.
For this tutorial you will need the .zip file below and thats all , it contains
the mac-10 picture we are going to be using , and the texporter plugin.
REQUIRED
FILES
PART
2: Making the sucker
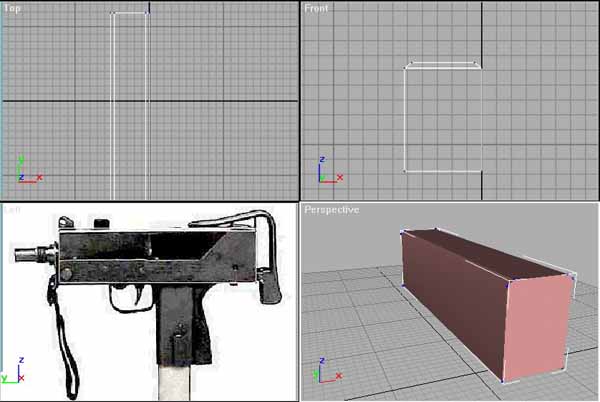
Ok.... start by clicking in your left viewport and pressing
ALT+B to use a picture as the backround , then click FILES on the new window
that comes up and find the mac-10.jpg included in the zip file above. Once you
selected the file click MATCH BITMAP and LOCK ZOOM/PAN.
Now that the picture is setup press ok and then in the left
viewport get rid of the GRID by pressing G because it can get annoying ;)
Now we actually MAKE IT ... so in the create tab click on box and make the
length segments to 2 and the rest to one and in the left viewport slide a box
around
the main body of the mac-10. Now go to the MODIFY tab and convert your mesh to
an editable mesh by clicking on the little cabinet looking thing  and then
clicking EDITABLE MESH , now we can modify the vertex's , face's and edge's.
Select the middle vertex's in the front view and bring them up until you see
them at the HIGHLIGHT on the mac-10 picture on the top of the body , then select
the top vertex's and scale them in using the UNIFORM SCALE  tool in the front viewport. Once you have done that it should look something
like this
tool in the front viewport. Once you have done that it should look something
like this
Now as you can see there is a cut in the main body of the mac-10
in the picture.... thats the hard part to do ... there is 2 ways. You can either
use BOOLEAN object or you can use the CUT EDGES. I personally cut the edges
because it doesnt waste polys like boolean can.
Alright so im gonna show ya the cut edges way. Go into sub-object mode and
select edges  then
roll down the bar a bit and you will see a CUT button
then
roll down the bar a bit and you will see a CUT button  , press that. Now you must cut from the top of the cut in the picture to the
middle and to the end if you get my drift so you create only 3 points or
vertex's. and then do the same inside of the one you did and it should look
something like this in the left viewport.
, press that. Now you must cut from the top of the cut in the picture to the
middle and to the end if you get my drift so you create only 3 points or
vertex's. and then do the same inside of the one you did and it should look
something like this in the left viewport. 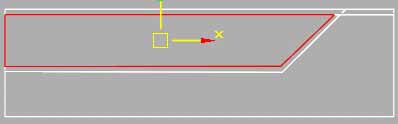
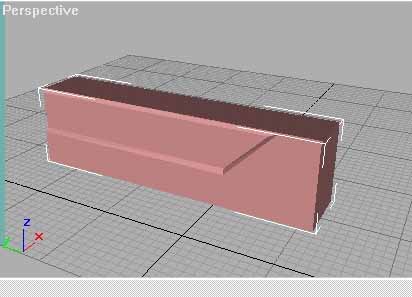
Now select the face that is selected above and in the front viewport bring it in
toward the middle of the gun a tad to give the look of that in the picture.
Once you have done that it should look similar to the image
below
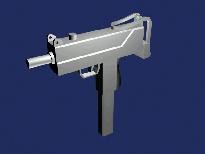
Ok once you have done that start on the handle , and then the
mag and so on and so on and try to keep at a reasonable poly count if you can
By the end you should have something resembling this
If you have any questions EMAIL ME and you can download the finished .MAX file here
Tutorial created by Tinyfly,
THANK YOU !!!
©
http://www.Planetfortress.com/TF2Models
TF2 is trademark of Valve
Software and of Sierra Online.
© 2000 TF2 MODELS - Hosted by Planetfortress
Web designer/Webmaster : IXNAY
