Skinmeshing Tutorial By Jai Barnes - T|nyF|y
Introduction:
Alright now im writing this assuming you have a
basic knowledge of 3d Studio Max whether it be version 2.5 , 3 or
discreet's beautiful new max 4 =). If you have a "basic" knowledge then
following this shouldnt be much trouble for you. Im writing this because I
have had tons of people icq me saying "tiny how do I skinmesh ?" , and I
could only point them to tutorials of the "shitty" way to skinmesh , now I
can just point you to the quick and efficient way of doin
it. Although
ive seen another tutorial around on this method I cant remember where.
Tools:
For this tutorial you
will need of course any version of 3d Studio Max from 2.5 and up. You will
also need TEXPORTER if you wish to paint what you have unwrapped but this
is strictly a skinmeshing tutorial. You will also need the glock model im
basing it on. Both texporter and the glock are available below.
Note: I used max 4 to make this glock and this tutorial
but principles remain for earlier versions.
Stage One- Detaching Faces:
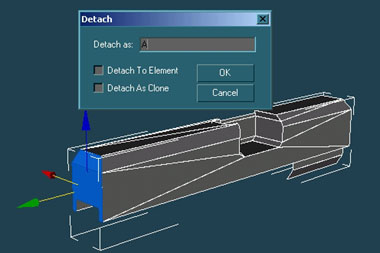
Alright we open up our glock.max , and hide everything except for the slide which is what we will be unwrapping. Once hidden collapse it to an editable mesh if it already isnt an editable mesh , now imagine the left viewport as our 2d image , select the faces that you want to unwrap , things like the back of the slide and top. Start with the back , select the 2 faces as shown below and DETACH them from the mesh and name it A , then select the top and detach it as B (you will see why we are detaching them in alphabetical order later) and any other faces you think will be seen ingame and will need to be unwrapped. If you do more then the 2 I have them call them c , d , e etc.
Stage Two- Cloning Objects:
Once you have detached all the faces you needed to select all the objects and CLONE them so you have a copy (again later you will see why we do this) , now group that copy and name it BACKUP
Stage Three- Unwrapping Detached Faces:
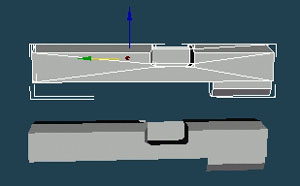
Now imagine your left viewport is your unwrapping port , grab the top you detached and rotate it so its facing the left viewport and do the same for the back and any other faces you detached. This is why I use this method , because its unwrapping in your viewports instead of in a crappy viewer that doesnt have as much flexibility as this. Not to mention this way is 100 times faster. After you have rotated everything to face the left viewport or whatever viewport you want to planar map on it should look something similar to the image below. If not then spank yourself 10 times and call yourself oprah.
Stage Four- Planar Mapping The Unwrapped Mesh:
Now you have to attach the faces back to the mesh in alphabetical order , so select the initial mesh (one you detached faces from) then attach it to A , B , C then d , e so on and so on. Now this HAS to be done in alphabetical order otherwise it will scruge up in the end when we morph it back into shape ok so do as I say damn you !! *slap*
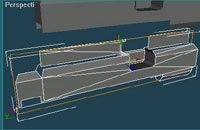
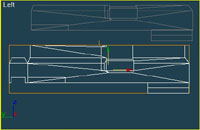
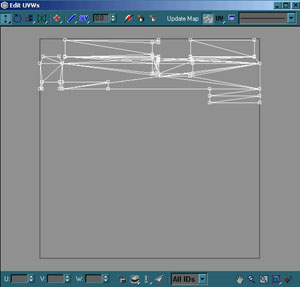
The next step is to apply a UVW MAP modifier to the object then click in the left viewport , and go down the scrollbar on the uvw map modifier options and you will see VIEW ALIGN and FIT , click them both in that order. Then add a UNWRAP UVW modifier then scale your unwrapped mesh to fit in the square correctly. Should look something like the image below by now.
Stage Five- Getting Mesh To Look Like It Used To:
Alright now that we have applied uvw coordinates to our mesh we can get it back to lookin like it should instead of the unwrapped goofey lookin peice o monkey shiznit it appears to be now. So select your BACKUP group and ungroup it , then select the initial part of the gun (the one you detached faces from) and hit ATTACH and attach it to A , then B , then C and so forth (dont accidently attach it to the unwrapped one) , now the reason we do this in alphebetical order is because if we dont it will morph and be all scruged up ok. So once you have attached it and its a single mesh again , select the unwrapped mesh (select dont attach) then go to compound objects and add a MORPH modifier , then hit SELECT TARGET and select your attached backup copy..... walaa !!! your mesh has transformed back into its original shape , now that its in its shape it still retains its uvw coord's , cool hey ? :).
Now its back to its original state you can collapse it to an editable mesh again then go to the vertex level and select all the vertex's and with a weld value of 0.1 hit the weld selected button , even though it was all attached back the vertex's werent , this will fix that. Now your home free just delete the backup copy for its not needed anymore, hit unwrap and you can see the coord's are there. Now if you want to paint it simply use texporter to export it as a .bmp.
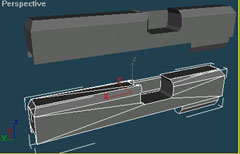
That concludes my tutorial , heres the glock pic for no good reason but to ..... show it
If you have any questions dont hesitate to email me: [email protected]
Tutorial created by Tinyfly,
THANK YOU !!!
© http://www.Planetfortress.com/TF2Models
TF2 is trademark of Valve
Software and of Sierra Online.
© 2001 TF2 MODELS - Hosted by Planetfortress
Web designer/Webmaster : IXNAY