Weapons
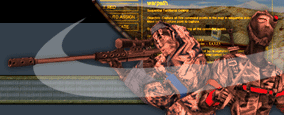
The Demoman (or demo for short) starts with 50 armor and can get up to 120. He also has 90% health and moves at medium speed.
He moves faster than a soldier, and at closer range he can defeat the big mean soldier.
The demo has two primary weapons: his grenade launcher and his pipebomb launcher. The
grenades explode on contact with the enemy. The pipebombs can be remotely set off by the demo.
The demo also carries the single-barrel shotgun, which is a good weapon to use if the enemy is far away.
As with all classes use the crowbar as a last resort.
Special Skills
Hitting the special skill key (right mouse button by default) will detonate any pipebombs that you have laid. The demo also can blast away portions of the map using his detpack.
Grenades
The demo carries the standard fragmentation hand grenade. His trump card, however, are the deadly MIRV
grenades. The MIRVs can do tremendous damage. When thrown, there is an initial explosion, after which the
MIRV separates into several smaller bomblets. These bomblets in turn explode for more damage. MIRVs can
literally clear a room, either by chasing enemies out or blowing them out.
Strengths
The demo is a deadly opponent in close quarters combat. One method of attack is to use the grenade launcher (which launches blue grenades) and send grenades at your enemy. The grenades will explode on contact with opponents, but they will even explode on their own if they do not touch anyone. The blast radius is half of normal fragmentation grenades. These grenades bounce unpredictably, so you want to try to strike your opponent before the grenades bounce on the ground. You can extend the distance of your launch by jumping in the air and launching the grenade at the top of the jump. Re-loading takes a bit of time, so don't get caught without any grenades when you really need them.
Another method of attack is to use your pipebombs (these are yellow in colour). A pipebomb trap is an excellent way of defending an area. Start by switching to your pipes and laying down some pipe bombs. The bounce of the bombs can be unpredictable, so they may not go exactly where you want them to go. Try crouching when you place them, the pipes will not go as far and will bounce less. Don't place too many pipes at one time. You may place as many as 8 pipes down. Any more, and your first pipe will explode. Ok, after setting your trap, go hide where you can get a good view of the trap area. Hiding makes the trap more devious, as enemies will not know if you can see them. Try laying your traps in heavily travelled confined spaces such as doorways and hallways. When the enemy runs over your trap, detonate your pipes. Note your pipes will explode by themselves after a few minutes. You'll have to refresh your pipes at that point. Finally, if you're killed while your trap is still set, your pipes will explode as well.
As good as pipebombs can be for defense, they can be used for offense as well. The problem with the grenade
launcher is that if you miss your opponent, the grenades will bounce harmlessly away. By the time they
explode, your opponent will be safely away. Wouldn't it be great if you could control when your grenades
exploded? Well, that's what your pipebombs are for. Try this: switch to your pipes and launch one towards an
enemy. When the pipe gets close your opponent, detonate it with your special skill key. Most classes won't be
able to take more than a few of these explosions. This attack is most effective when you are able to rain
down your pipes on your enemy from high above. One final note about pipebombs, there are a limited number of
them available to each team, and once that limit is met the other pipes will explode. Make sure you communicate
with your teammates if you plan on having a couple pipetraps around.
One final thing that can be done with the pipes is pipe jumping. This technique is similar to rocket jumping, as it is used to access high areas. To do this, lay down one (and only one) pipe roughly where you want to jump. Take a few steps back from the pipe and run towards it. Then jump up in the air so that at the top of your jump you'll be right over the pipe. At this very moment, detonate the pipe. You'll be propelled high into the air. Note this does a fair amount of damage to you.
Finally, the demo is capable of using his detpack to blow open new areas of a map. To do this, stand where you want to set the detpack and hold down the set detpack key (the 'm' key by default). When you get a message that says detpack set, get away from the area. By default, the detpack will explode in 5 seconds. You can change that to either 20 or 50 seconds by pulling down the console and typing:
bind m +detx
where x is either 5, 20, or 50. Both teams will be made aware of a set detpack because a "FIRE IN THE HOLE" message will appear once a detpack is placed. Exploding detpacks can damage opponents. So, if you come across a detpack on the ground, get clear of it (unless you're a scout who can disarm them). Some maps will allow demos to re-seal a previously opened area by placing another detpack in the same place. Note that a demo carries one detpack per life and you cannot replenish detpacks like you would with ammo.
The demo is good at offense, but great at defense. At defense, the demo's aresenal of pipebombs, grenades, and detpaks often makes him better than an engineer with a high level sentry gun. If you have one demoman, put him on defense.
Weaknesses
The demo is only effective at close range. Save his single-barrel shotgun, he has no medium or long distance weapons. As well, his grenades can be dodged by some of the more nimble and fast classes.
How To Defeat A Demo
To defeat a demo, make sure you have plenty of distance between him and yourself. He'll try to close the distance quickly so that he can use his grenades, pipes, and MIRVs. Don't let him do that. Run away to keep your separation. Use medium to long range weapons against him, such as: nail guns, auto-rifle, sniper rifle, shotguns, and rockets. Try the run and gun game: fire your weapon from a distance, when he tries to close, run away, repeat a few times and you should have him. Note that with the demo's extensive inventory of explosive devices, he is especially vulnerable to the EMP grenade.
If a demo has laid out a pipebomb trap, it can be quite difficult to get past. If you are an engineer, the problem is simple. The engineer's EMP grenade can detonate any pipebombs within the EMP's blast radius. The key is to prime the EMP a few seconds before throwing it onto the pipes. That way, the demo has no time to re-set his trap. All he sees is something thrown onto his trap, his pipes going off, and an enemy engineer entering the area. If you are not an engineer, you can goad the demo into blowing his pipes early. Run up to the trap (but not too close), and then back away suddenly. He might be nervous enough that he'll blow the trap and you can then waltz right in.
Weapons
The medic carries the unique medikit. This "weapon" can heal teammates or infect the enemy.
The medic's arsenal is rounded out by the deadly super nail-gun, single, and double barrel shotguns. If you run out of ammo you will have to rely on you are medikit.
Special Skills
Hitting the special skill key [right mouse button by default (+attack2)] will select the medikit. The medic can heal teammates, put out their fires, cure their infections, and even heal himself over time.
Grenades
The demo carries the standard fragmentation hand grenade. Also, the medic carries the concussion grenade (concs) that the scout has as well. Thus, the medic is capable of conc jumping to access higher elevation areas.
Strengths
The medic is an excellent medium or short range fighter and is a good choice for either offense or defense. He has a very fast foot speed, and is capable of assisting teammates or causing havoc on the enemy side. Use him in a suporrting role, or as a flag runner.
The medikit the medic carries can accomplish many tasks. First, it can heal his teammates. Simply get right up to a teammate and press the primary fire button. The teammate will have his health restored. Continuing to heal the player will cause his health to be boosted above and beyond his maximum by 50 points. This extra boost will slowly wear off, and will then stay at the normal maximum. A useful technique is to boost your teammates up right before they enter an enemy area. Those 50 extra health points might make the difference for them. Also, the medikit will heal the medic himself over time, 2 health points every few seconds. The medikit does not have to be selected for self-healing to occur.
Second, the medikit can infect the enemy. Simply walk up to an opponent and try to heal them with the medikit as you would with a teammate. Instead, you'll infect the enemy. It only takes a split second of contact and they'll be afflicted. At this point you may run away. Alternatively, you may continue to infect the player, draining his health quickly. In any case, your opponent will slowly have his health drained until he dies. He can also infect his own teammates by touching them. It is possible to infect an entire team just by infecting one player and letting him spread the infection. Note, the best way to infect is to sneak up on the enemy. Hide and wait for enemies to pass, then infect them from behind.
Third, if you can infect the enemy, then certainly an enemy medic can do the same. You can prevent your teammates from dying from their infections by curing them. Simply walk up to them and do the same thing as you did when you healed them. A message will pop up saying you cured your teammate. Listen for your teammates who call for medic. They might be infected and will need your help. Also, infected players will grunt with pain everytime their health gets drained. This too is a clue for you to help.
Fourth, if an enemy pyro has immolated your teammates, you can put out their fires with your medikit. This stops their health from being drained and heals them back to their maximum levels.
Even without the medikit, the medic is able to accomplish much. The super nail-gun spits out projectiles at any amazing rate. Coupled with his lightning fast foot speed, a medic can run down a target and rip him to shreds in seconds. The fact that he has explosive grenades as part of his arsenal makes him even more dangerous. And since he has concs, he can conc jump too. Please read the scout section on how to conc jump. A favourite technique of medics is to conc jump over great distances in a blink of an eye. This surprises the enemy and an infection-spreading medic is in their midsts before anyone can react.
One final note: a medic receives one frag everytime he cures a teammate or puts out a fire. It is quite possible to acheive an excellent score playing medic and not even killing one player on the other team.
Weaknesses
As effective as infecting enemies is, the medic must get right up to an opponent to do so. This can give an enemy several opportunities to strike before the medic can get close enough for an infection.
How To Defeat A Medic
The key to defeating a medic is keeping your distance... lots of distance. If he gets close he can use his super nail-gun to chew you up or he can infect you. The problem is he runs extremely fast and can chase anyone down except for a scout. Your best bet is to keep him far away. Though, remember, his nail-gun has excellent range and he can throw explosive grenades at you too. Also, he can conc jump, meaning he can be beside you in a blink of an eye. Soldiers seem to have an easier time with the medics. Their rockets can blow them back, and it only takes two rockets with good splash damage to take a medic down.
Weapons
The HWGuy (Heavy Weapons Guy) carries the menacing assault cannon, just like Jesse "The Body" did in Predator.
The HWGuy's arsenal is rounded out by the single and double barrel shotguns.
As with all classes use the crowbar as a last resort.
Special Skills
Hitting the special skill key (right mouse button by default) will select the assault cannon. The HWGuy also gets the distinction of the class most resembling a tank. He is heavily armoured and moves extremely slow.
Grenades
The HWGuy carries the standard fragmentation hand grenade. Also, he carries the MIRV grenade, just like the demo does.
Strengths
What can you say about the HWGuy? Being so heavily armoured and having an amazing maximum health level, he is extremely difficult to take down. The assault cannon he carries can rip apart most classes in a flash. The cannon is more effective up close as distance causes the bullets to spread out. Also, being heavy makes him less suceptible to being moved around by explosions and concussions.
The HWGuy makes for an excellent defender when he stands in doorways and narrow corridors (such a wide frame on that guy!). Enemies have no where to go and are almost always cut down by the assault cannon. As well, his MIRVs can cause a lot of damage when they explode and when the resulting bomblets explode too.
For offense, the HWGuy can make an excellent "first guy in". He can take the brunt of the defenders first volleys, laying down cover fire and MIRVs, thus allowing his more nimble teammates to scoot in behind.
Weaknesses
The most glaring weakness for the HWGuy is his extremely slow foot speed. He cannot chase down any other class. If the assault cannon does not take down a fleeing player before he turns a corner, consider it a successful escape. To make it worse, once the HWGuy is firing his assault cannon, his foot speed gets cut in half (from what was already really slow). The assault cannon also takes a second to spin up before the bullets start to fire. A scout can zip by a HWGuy and bullets from the assault cannon will still be spinning up.
How To Defeat A HWGuy
The HWGuy is extremely slow, so use this to your advantage. You can try to engage him from far away. His cannon can still reach you, but its effect is lessened at greater distances. Use rockets or the sniper rifle to pick him off from afar. With lesser weapons such as shotguns or nail-guns, try running and gunning. Let him get a little closer, then shoot your weapons at him. When you hear his cannon winding up, duck around a corner or wall. He'll chase you, so shoot him again. Then run to the next area when you can get some cover. Shoot, cover, shoot, run. Don't forget to use grenades! The HWGuy is slow, so even a moderately well timed grenade can affect him. If all else fails, kick him in the knee cap and run!