DIGITAL SCULPTING - A TUTORIAL?
This has to be one of the most difficult tutorials to write because of it's
primary, fundamental difference to the others, and that is, with all the other
tutorials (except maybe the skinning one) there are no two ways to go about them,
so I can write it, showing you step by step exactly how to do it. However, with
this modelling tutorial, I can no more teach you how to be a great modeller than
I could put a block of stone in front of you and a chisel and teach you to be a
great sculptor. That is, in effect what you are doing when you model. You are
sculpting, digitally. This means you have to consider the appearance of the
subject from all directions. Proportions have to be exact and symmetrical. It
takes a lot of practice and a lot of self-criticism. It has taken me years to
get where I am now (sculpting aswell as 3D Modelling) and I am still learning
all the time. So a large percentage of your success in following this tutorial
also depends on your natural talent. On the other hand, don't let this
discourage you from trying. Everyone has to begin somewhere and what I am trying
to do here is write the tutorial that I always wanted when I started modelling
way back, for Quake1.
So, what this tutorial will be really, is not so much an easy-to-follow
step-by-step guide to making any model that you want but rather a collection of
hints and tips using a basic humanoid as a subject. You will need to be familiar
with the first two tutorials that show you how to set your workspace up and also
the fundamental basics of mesh-editing. The latter being essential or some of
this will become totally incomprehensible.
Also before we start I'd just like to mention that the following modelling
method has been inspired by Andrew Gilmour. It was his tutorial that I initially
read way back when, and while I do things much differently now, it was an
excellent and simple tutorial that you can still read now at the Quake2
Modelling Studio
TO BEGIN AT THE BEGINNING
So we have our Studio MAX open and a blank screen in front of us. Where do we
start? Allready there are several options. One is to create a box with 1x3x4
squares dividing the surface up which is the way I used to work. Another is to
create a 'geosphere' and sculpt your model as if it were clay (a method used by
my friend at 'Lionhead'). You can try and make your model all in one go. You
could try and make the head, torso and limbs seperately and attach them later -
This is the way I work. I have created a series of limbs and a basic torso and a
basic head using pretty much the method I'm about to show you, and I keep them
all in seperate files. All my models are simply developments of the same series
of bodyparts. The options are plentyful, we could go on... and on... and on... I
need to choose a method and start somewhere or this could run to page after page
and hundreds of megs of webspace.
So, for the sake of my sanity and brevity, I am going to show you how to make a
basic low-poly humanoid using a box as the base. It will then be down to you to
practice what I am teaching you, experiment and embellish the basic shape
yourself.
SETTING UP THE RAW MATERIALS
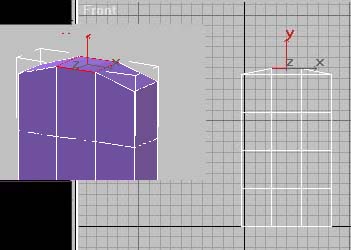
So, first you need a box one face deep by three faces wide and four faces high.
Make this by going to the creation tab. selecting 'Standard Primatives', though
it should already be set to that. select 'Box' and go down to the rollout on the
lower right-hand side.
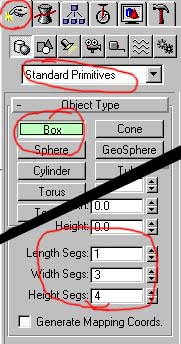
At the bottom there are three parameter rollers. Set the width to 3 and length
to 1 and the height to 4. Now when you draw your box it will be divided into the
relevant faces like so.
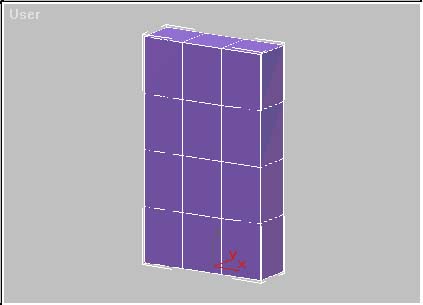
Draw your box beginning in the 'Top' view so that the faces are arranged
properly, ie: 3 x 1 and 4 high.
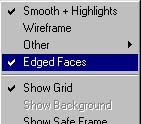
If you want to see the box shaded with the wireframe overlayed, right-click the
Perspective viewport title and make sure that 'Smooth + Highlights' is selected
and also 'Edged Faces'. Like so:
Okay. At this point I usually collapse the stack, or convert our friend here to
an 'editable mesh'. The reason being that I find meshes with too many modifiers
on to be inherrently unstable. You will eventually get what I call the 'click-of-death'.
Basically if you keep adding edit-mesh modifiers and whatever else into the
stack, at some point, suddenly as you select a vertex or undo a mistake, the
mesh will explode into a mess of jagged angles. Totally corrupted. Even, for
reasons I cannot begin to fathom, the backup files are corrupted. So it
basically means going back to the last saved file and starting again, until it
happens again. So, a sound piece of advice: Instead of applying an 'Edit Mesh'
modifier, convert your standard primative box to an editable mesh and save your
monitor a severe beating =)
You do it like this:
With your new box selected, go across to the modifier rollout:

and click the stack button. which will give you the following conversion options:
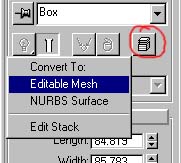
Select 'Editable Mesh' and your box will be converted into an editable mesh
ready to have it's vertexes tweaked and it's faces extruded.
IN JUST SEVEN DAYS I CAN MAKE YOU A MAN
Well, hopefully a bit faster than that but we'll see.
So first we'll give him shoulders. Select the centre square at the top of the
box by going into the sub object and selecting 'face'. Then select the top,
centre face by clicking on it in the viewport.

Now move that face upwards slightly in the 'front' or 'side' view like so:
TIP: You can lock your selection by clicking the padlock symbol at the bottom of
the screen.

Or by tapping the spacebar, This is a damned handy tool especially with complex
models. If you make your selection first and then click the padlock button (or
tap the spacebar) your selection, wether it's a whole object, vertex, face or
edge, will be locked. Meaning no matter what you do, you cannot deselect it or
select anything else by mistake. Once your operation is complete then click the
padlock again (or tap the spacebar again) to unlock the selection.
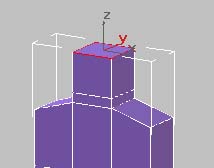
Now for the head. Under the 'face' sub-object rollout you will see the extrusion
button and the extrusion parameters roller.
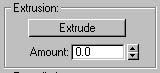
The two 'up' and 'down' arrows allow you to raise and lower the ammount by which
a face is extruded. Using the 'up' arrow, raise the extrusion parameter slightly.
Don't concern yourself with the parameters number, watch the screen. The square
that you selected will move away from the body creating a new box in it's wake.
Do this twice. Firstly a short way. This will be the neck and secondly a little
further. This will be the head. You should end up with something like this:
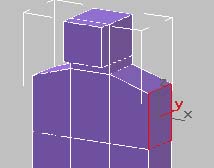
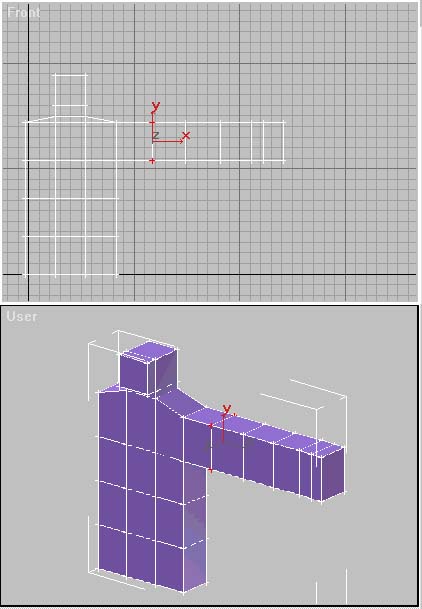
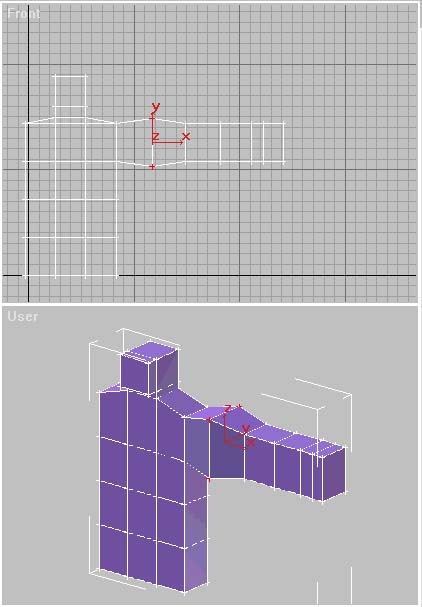
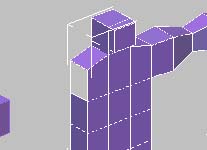
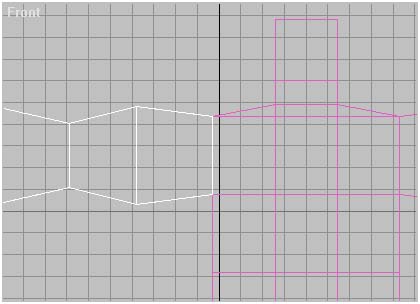
Now select one of the side faces on the second extrusion you made. This will
become the face. Extract it again to make a jaw. Like this:

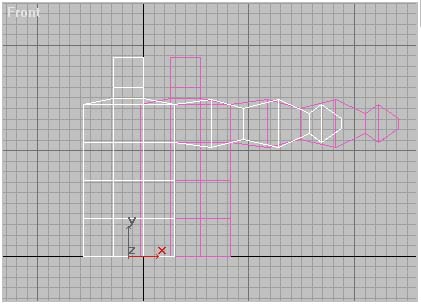
Next we make the arms.
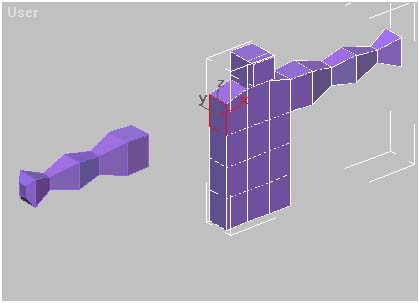
Select one of the top/middle squares on the side of the box. Like so:
and extrude six times like this:
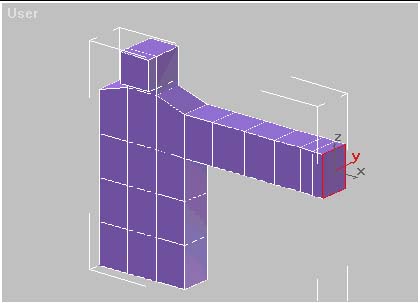
What you have just done is create enough segments in the arm to create a bicep,
elbow, forearm, wrist and hand.
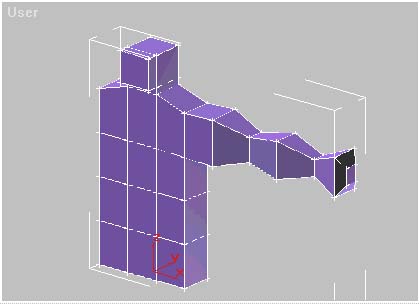
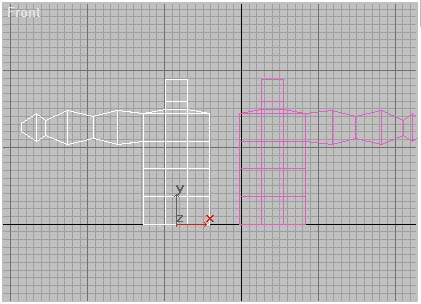
Now in the sub-object switch from 'Face' to 'Vertex'. Now select the four
vertexes in the first segment from the main body:
and using the scaling tool...

and enlarge them thus:
Now do the same to all the segments so that you have a vague arm shape like this:
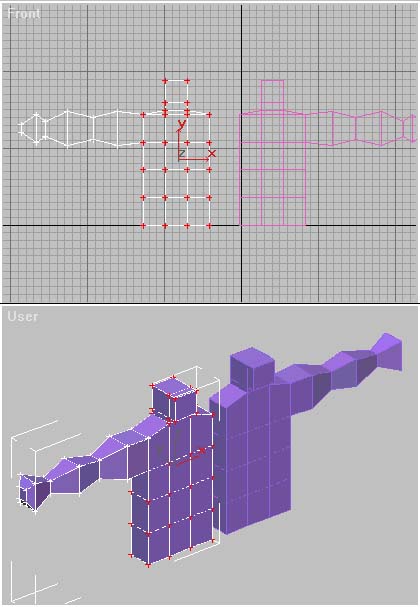
Now, you can repeat the process on the other side. If you are particularly
meticulous you might even get them symmetrical. However It is far easier to copy
the existing arm and mirror it. This is how:
Shut off the sub-object and select the move tool from the top of the screen:

and set the movement restriction to 'X' only.

Now, working in the 'front' viewport and holding down the 'shift' button, move
the model to the left or right. You will see that a duplicate model is created.
Now with the new model still selected, mirror it by clicking the 'mirror' button
on the top toolbar.

Your new model should now be flipped horizontally like this:
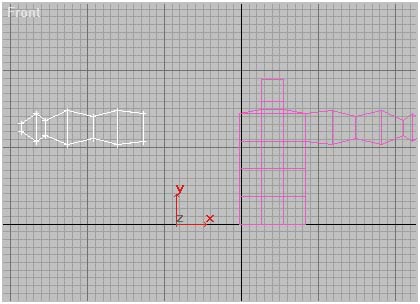
Now activate the sub-object button again and select 'Vertex'. Now select all of
the vertexes on the model except those on the arm and the arm root. Like so:
And delete them.
Now shut off the sub-object and select the original model. Activate the
sub-object once again and select the square that makes up the root of the other
arm.
...and delete it. The reason we delete this face is because if we were to attach
the new arm to the model, this face (remember that's two triangles or 'polys'),
would be hidden inside the model and never seen, and would therefore be wasted.
Be wary of wasted faces all the time.
Okay, now shut off the sub-object and working in the 'Front' viewport with the
movement restrictions set to 'X', move the new arm across to the original body
so that it's base is level with the hole you just created.
Now select the original model and make sure you are in the modifier rollout,
with the sub-object button deactivated. You should see two buttons, 'Attach' and
'Attach Multiple':
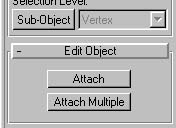
Click the top 'Attach' button and then select the new, mirrored arm you created.
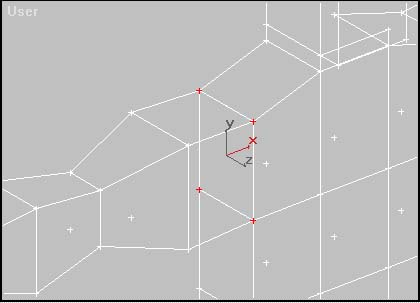
The two will be merged as one mesh. Still, it's not quite there. At the arm's
root , the arm is still seperate from the body by a microscopic amount. Each
vertex at the new arm's root is actually two but they are so close, they look
like one. You'll only see it if you zoom right in close. You need to weld the
vertexes at the arm's root so that it is truely attached to the body. Activate
the sub-object button and select 'Vertex'. Select the vertexes at the arm root:
Now under the Vertex Sub-Object roll-out you'll see the Weld-Selected button:

Click this button and it will seem that nothing has happened. Actually the
vertexes will have welded together.
If they are not close enough you will get the following message:
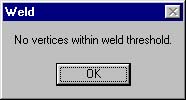
If this happens, then your vertexes aren't close enough (which in this case is
unlikely). There are two things you can do. Either select the offending vertexes
and move them closer by using the scale or move tool. Alternatively, raise the 'Weld
Thresh' parameter under the welding buttons, slightly. Now try again.
Your model should now look like this:
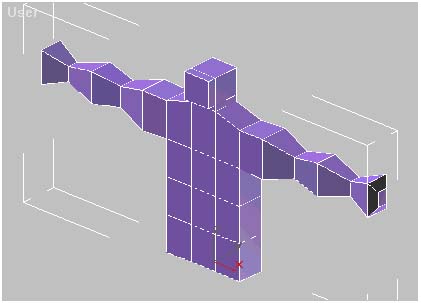
Now we are going to repeat the whole process with the legs. Select one of the
side/center faces on the bottom of the box:
And extrude the face five times to allow yourself enough segments to create
muscle bulges and a foot.
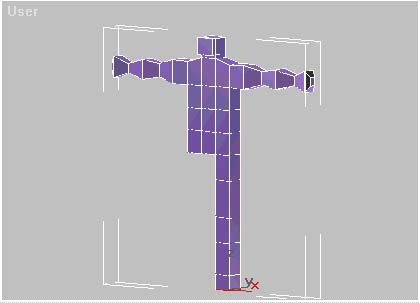
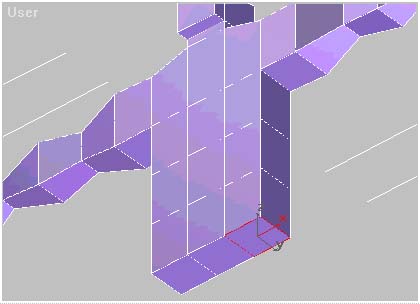
Now scale the vertexes at each segment as you did the arm to get a leg shape.
Finally select the bottom segment and extrude to make a foot.
Now duplicate, mirror and weld the other leg in the same way that we did the
arm.
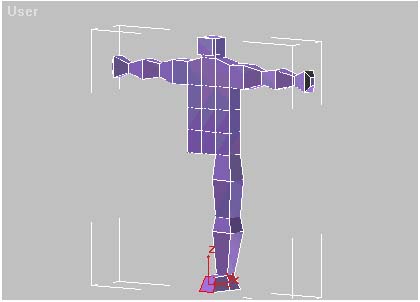
Your model should now look like this:

So it ain't big and it ain't clever and you wouldn't give it to your mother on
mother's day. However, it's a start and we can develop a better shape from here.
Tutorial created by Scarecrow,
THANK YOU !!!
©
http://www.Planetfortress.com/TF2Models
TF2 is trademark of Valve
Software and of Sierra Online.
© 2000 TF2 MODELS - Hosted by Planetfortress
Web designer/Webmaster : IXNAY