PROPORTIONS
Allright. What we have now is humanoid in a very broad and vague sense of the
word. You need to now adjust the model for two reasons. Firstly and most
obviously it needs to be more accurate in shape and secondly it needs to look,
well, less square.
It's time to study the genuine human form. Fitness magazines are a good source
for super-hero types. Porno mags are excellent resource for super-babes. If you
can bring yourself to buy either. Study your mates and, more enjoyably your
partner =).
Study the way the body curves. Where each joint is in relation to the rest of
the body. How long are the legs compared to the torso?
Also consider the effect you are trying to achieve. Halflife goes for realism so
Gordon is a realistically proportioned model as opposed to Quake2 which retains
a slightly over-the-top feel with largely proportioned models, oversized muscles
and small jar-heads.
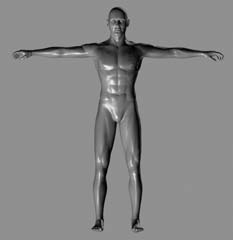
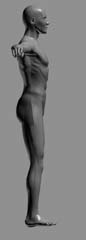
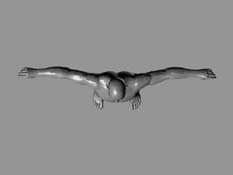
Here's a basic humanoid male that I grabbed from 'Poser 3'. Front, side and top.
I've included these pictures at fairly good quality which you can import into
Studio MAX and use to proportion your model.
SETTING UP THE VIEWPORT
How do you set your background images up in MAX? Well, it's like this:
First save the three images by right-clicking on them and saving them as
whatever file you want. I called them 'bloke_front.jpg', 'bloke_side.jpg' and 'bloke_top.jpg'.
You can call them what you want.
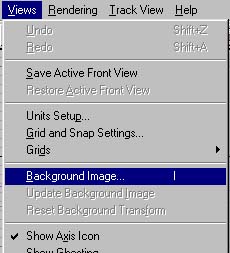
Now select the 'front' view by right-clicking in it and then go to 'Views' and
select 'Background Image' like so:
This will then present you with a window like this:
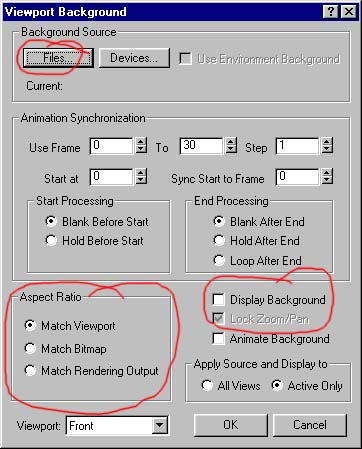
First click the 'Files' button at the top and select the front view of the bloke.
Remember that this is for the 'front' viewport.
Now check the 'Match Bitmap' radio box on the bottom left. If you have the
'Match Viewport' box checked then the image you choose will be stretched and
skewed to fit the viewport which doesn't help.
Now in the bottom right, the 'Show Background' box should be checked and you
will also notice the box underneath it which is the 'Lock Zoom and Pan' box. If
this is checked then the image will scale and pan with the viewport. If it is
unchecked then the image will remain still while the viewport pans, zooms and
rotates. This will be handy, so remember it.
Click 'OK'. If all is well, then your 'front' viewport should look like this:
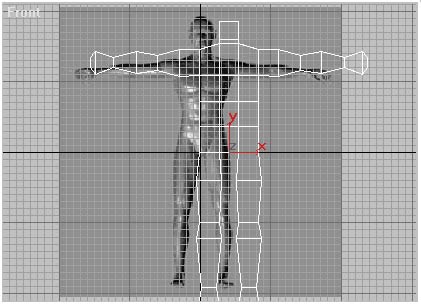
Obviously the grid is getting in the way, so right-click on the viewport title:
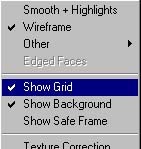
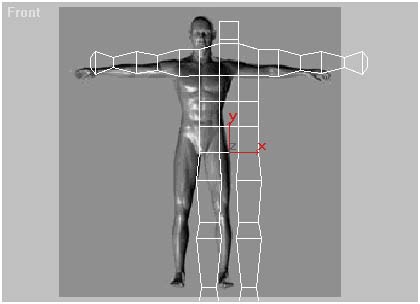
...and select 'Show Grid'. The grid will disappear making life substantially
easier.
Allrighty, now we have a change in tools. You have to get used to using the
viewport tools, otherwise things are likely to get a bit messy. The viewport
tools are the ones on the bottom right of your MAX screen:

These do not effect the model at all but rather the viewport. With 'Lock
Zoom/Pan' deactivated you can use the 'Pan' tool to move your model on the
screen without effecting the model itself. Maximise the 'Front' viewport so that
it is full-screen. You do this by making sure the 'Front' viewport is selected,
by right-clicking in it. Then click the 'maximise button:

The front viewport now fills the entire screen, making it easier to see what you
are doing. Like my screengrab above, your mesh may not be over the picture of
the bloke in the background, so using the 'Pan' tool...

...in the front viewport, move the view so that your model is roughly centered
over the picture.
The background image may move. Go to your 'Background Image' window (as we did
above) and uncheck 'Lock Zoom/Pan'. I sometimes find that even if you unchecked
it in quarter view, it will still be checked in full-screen view.
NOTE: I am still using the small view for the sake of convenience, you should be
now working in full-screen view.
Now your model might be a bit too big for the image or it might be a bit small
as in mine. Remember, we don't use the scale tool now, we use the zoom tool
instead:

With the zoom-tool selected, place the pointer in the viewport and, holding down
the left mouse button, drag down or push forward, and the view will zoom in and
out.
WARNING: If you have 'Lock Zoom/Pan' checked and zoom in too close, you will get
a warning that the background image will use over a zillion megabytes of memory
and you will be asked if you wish to display the background image. If this
happens, choose not to show the background image. Then zoom out again and then
right-click the viewport title to get the drop-down menu and select 'Show
Background'.
You should have your model centered pretty much on the bloke picture now:
MAKING IT FIT
Okay, now we revert back to the usual sub-object and mesh-editing tools instead
of the viewport ones. Make sure your figure is selected and activate the
sub-object button. Select the Vertex setting, if it is not allready selected

Now selecting each vertex, move them in by either using the scale tool or the
move tool, so that they fit snugly around the figure's form.
TIPS:
To keep things symmetrical, select each vertex and their opposite number and
scale them using the non-linear scaling tool:

and the XYZ locks to restrict the direction in which they move.

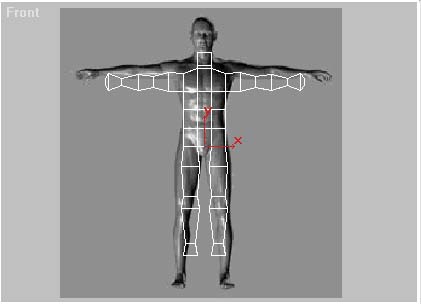
For example, at the waist, if you were to select the vertexes on either side of
the model, and use the non-linear scaling tool with the directional buttons set
to 'X' only, you could make them move toward each other or away from each other
horizontally, or ONLY in the X direction.
Select vertexes by dragging a selection box around them, rather than clicking on
them, because many of the faces on the model are edge-on to you and there are
vertexes behind vertexes so you can't see them. If you wish to select two
vertexes but not a third that is between them, simply drag a selection box
around the first one and then do the same to the second one whilst holding down
the CTRL key. Your original selection will not be lost.
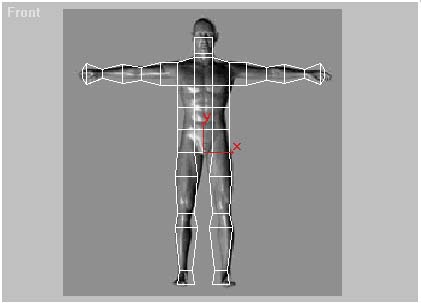
When you have finished, your model should look like this:
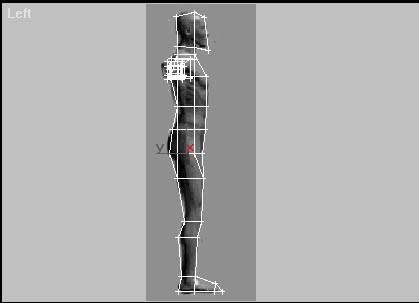
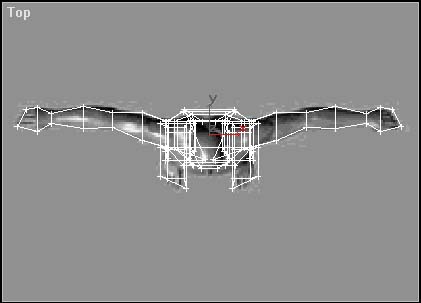
Now you need to do the same with the top and side views. It works exactly the
same way. You choose your side or top viewport, you load in the relevant top or
side image and you use the Zoom and Pan tools to arrange your model against the
image. Then you move the vertexes to fit the form of the image. You should end
up with something a little like this:
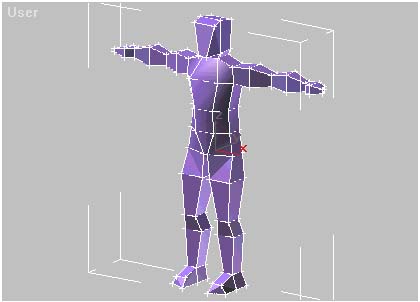
And now, if you look in the Perspective window, your model should look a little
like this:
Tutorial created by Scarecrow,
THANK YOU !!!
©
http://www.Planetfortress.com/TF2Models
TF2 is trademark of Valve
Software and of Sierra Online.
© 2000 TF2 MODELS - Hosted by Planetfortress
Web designer/Webmaster : IXNAY