PROPORTIONS
Okay, our existing model is not very convincing as far as humanoid shapes go.
This guy was a human on his Grandmother's side. So we need to adjust the
vertexes in the mesh to make our man, Geoff here more man-like.
Okay, I'm afraid to say this is where the fit hits the shan. In Studio MAX it is
possible to load images into the viewports, enabling you to get an image from 'Sweating
Geek Monthly' and fit your vertexes to it. Kind of like tracing. This is not
possible in Milkshape, so you're going to have to take a crash course in
sculpting accurately.
How can I help? Well, I can't, except to say, 'practice' and if it's not good
enough, accept it's not good enough and try again. I have included some
reference pictures and also some tips to get your model more accurately shaped.
Study the shapes of things. Look at your mates (not too closely). Look at your
partner (the closer the better). Get lots of reference material. Body builder
mags are good source material for superhero types. Porno mags are good material
for super-babes (plus what a great excuse. 'Hey, Mom! They're reference
material').
Also when you are proportioning, consider the effect you are trying to achieve.
The Gordon model and, in fact models in general in HalfLife are fairly
realistically proportioned, as opposed to the oversized Quake2 models with their
tiny jar-heads.
One of the best ways of getting the general proportions right is to import the
valve Biped into the model and scale your model to fit the skeleton. You will
have to do this wether you agree with the anatomy or not, so it's worth doing
that first.
You can do this by downloading the Valve Skeleton in Milkshape format (ms3d),
from Here.
It's only 3.27K so it'll take but a second. Open your model and then select
File/Merge and open the skeleton file. A wireframe skeleton will appear in the
workspace. The skeleton is the right size and shape for the Half-Life player
model standard, so your mesh should be resized to fit this as closely as
possible.
NOTE: If you have followed my tutorial to the letter, you will find that the
model is massively bigger than the skeleton.
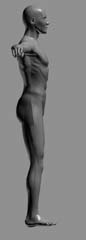
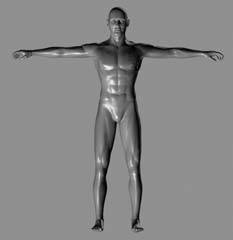
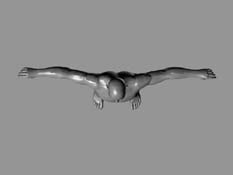
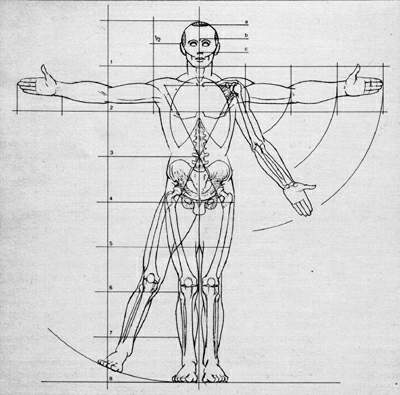
To help you get the muscle structure accurate, I have included some views of a
fairly average male I grabbed from Poser3. Also a nice diagram I scanned from a
friend's anatomy book. They all give you some idea of the size and shape of the
human body. Where do the elbows come to? How long are the legs? How big is the
head compared to the arms? Notice how the back snakes s-like down from the
shoulders to the buttocks? etc etc... All these things need to be considered
when modelling without the aid of a visual backup.
You need to pull the vertexes together now to make the shape of the model more
humanoid.
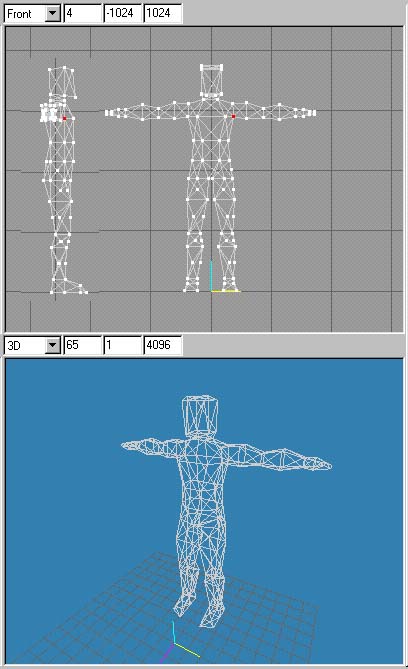
Hopefully you will end up with something like this:
TIP: If you get one arm or leg perfect, remember you can mirror it and replace
the other one.
Use the scale tool as well as the move tool to move things symmetrically.
Next Page...
Tutorial created by Scarecrow,
THANK YOU !!!
©
http://www.Planetfortress.com/TF2Models
TF2 is trademark of Valve
Software and of Sierra Online.
© 2000 TF2 MODELS - Hosted by Planetfortress
Web designer/Webmaster : IXNAY