 Tweet
Tweet
Nice details. Have you used d3 hands? The human modells in d3 having the same hand shape.
-
-
I worked the model backwards through all the extra detail down to more of a base mesh. I obviously added a head and made a ton of proportional adjustments. I also deleted the other hand and made a mitten with an unfinished thumb.
Summin weird about the legs that I haven't figured out yet. ...maybe it's just because it looks like he is wearing fruit of the looms and boots. Possibly, textured legs wouldn't look so weird.

This is going to be the last update for a while. I need to get back to my real project. I will revisit this the next time I need a break from programming
@sza - I just made up a hand with a trigger finger. I know it looks like shit. I was sort of chasing my tail on that. My thumb method was really poor.Last edited by MadGypsy; 02-18-2014, 11:46 AM.Comment
-
who said it looks like shit? Its doom 3 standard technique ...a very good optimization. A good low poly shape is better than too much polys plus a unrealistic shape.
Last edited by Sza; 02-18-2014, 01:28 PM.
...a very good optimization. A good low poly shape is better than too much polys plus a unrealistic shape.
Last edited by Sza; 02-18-2014, 01:28 PM.Comment
-
I realized what is weird about the lower body (well, at least one main thing). His hips are too low and connected all wrong. I had the top of the buttocks leading up to the hip and around to the front. By just taking a minute to feel around on my own body, I realized that the hip gets wrapped from just above the butt and there is a bigger dead space between the top of the leg and just under the hip.
Basically the whole model needs to be split in half on the loop just under the hip bone, the torso moved up some and an entire face loop added in the new empty space, that was created in separation. This will also add a perfect loop for where most people wear their belt.
I can envision this in my head (when staring at my last image) and the legs are still gonna look weird, but I can't figure out what's wrong with them. You would think it's simple - thigh, knee, calf - whats so hard about that? Well, I don't know what's so hard about it, but if I ever figure it out I will make it look better.
I also need to make the hands a hell of a lot smaller... but I already knew that, they aren't even complete yet though, so I am not really worried about proportion at the moment.Comment
-
The hand have same size as a human face (front side). The width have size of a half (litlle bit more) head (front side) and the lenght will be from the forehead (the top of the finger) to the chin (the bottom of the hand). Put your hand on your face just like i said and look in the mirror May be it will help you a little bit. I think its the best logic solution to make ralistic size of the hands.
@your model: the hands should be litlle bit smaller and the arms litlle bit longer. The bottom of a hand should be on the same level as the balls( ).
).

 Last edited by Sza; 02-24-2014, 03:20 PM.
Comment
-
@Sza - thanks
--
I re-proportioned and reconsidered the entire model starting from the feet up.
NOW

BEFORE
Last edited by MadGypsy; 02-24-2014, 03:53 PM.Comment
-
No problem, i can help if i can and if i know the problem. It looks nice, more natural. One week or two and you will be able to work for ID software can u upload a screen where i will able to see the hands and the whole body? I see the arms are now little bit longer but i cant see the hands
  I think the model is now perfect! One thing you need is to place a extra(where the 3 finger are together) bump map on your hands model and it will look great!
Last edited by Sza; 02-24-2014, 04:16 PM.
I think the model is now perfect! One thing you need is to place a extra(where the 3 finger are together) bump map on your hands model and it will look great!
Last edited by Sza; 02-24-2014, 04:16 PM.Comment
-
I see some other tweaks that need to be made but mostly I think I can just add thumbs and this model will serve as a decent base mesh.
I want to unwrap it and rig it, then I want to add back in all the clothing details I removed.
Maybe you (@Sza) could texture it... texturing is my weakest point and it seems to be one of your strongest.Comment
-
you can do a litle bit high poly model (using your low poly) with normal 5 fingers and bake it. than put it on the new low poly version. I will do it (q2 monster skins) in the future the same way but i will use mudbox. Your model is in a perfect pose so it will be very easy but q2 monster models have no standard stand pose like this one so it will be fokin hard... idk how to center the modells and how to mirror the body parts postions from the left side to the right and/or vice versa
Here is what i mean. The 3rd pic is a low polymodel but he uses normal map which was baked from the high poly. this 3 pictures uses the same model size and shape but he have added some polys and baked it as normal for the simple model which you can see on the first pic. all you need is to do a "med poly" 3 finger shape, bake it, and put it on the original low poly. This way you can add even more than this(bad ass details and shapes) if you want but you know it already. The base low poly and high poly should not have to big shape size differences because it will look shit.
Idk exactly what you mean but i do simple (in Mudbox) add subdevisions(?) (idk if it was the name) to make high poly from the original low poly q2 model. After that i make a high poly details not only for the fingers and the bullet holes or a screws, but for the whole (extra shapes which making a model look like a high poly) model. Than i simple bake it as normal. This method is very good only if you want to do details for whole model(every part of the model).
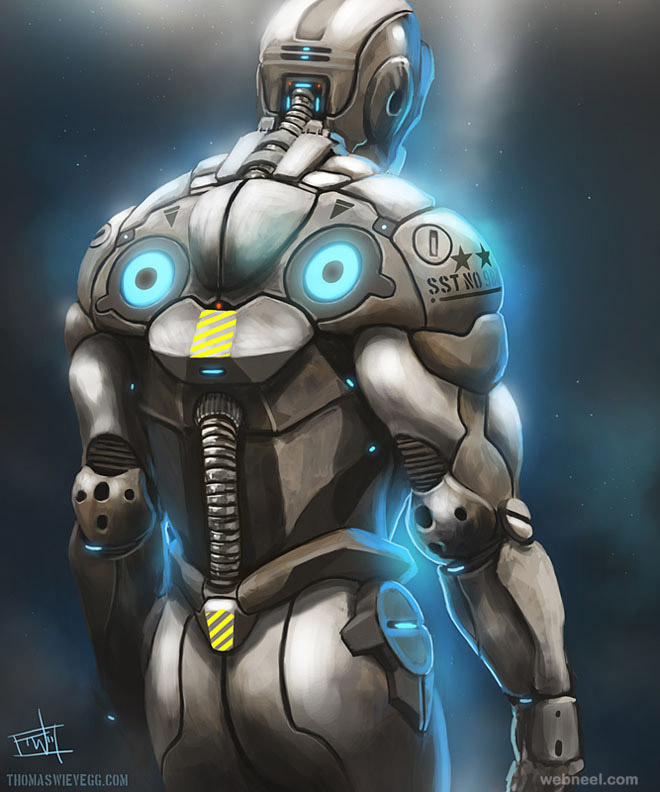
The low poly is ready so you need to start to doing high poly May be some robot with nice metal shild plates. Something like robocop? Hmm... i could make for you high poly details too because you have a perfect stand pose so i can work very good with the mirror function. Shit i have now a very nice vision in my head! but i must download and install mudbox first! fooook!  I need some time to download it! hold on
  Do you want to change the base low poly model a litlle bit? I mean do you want to add/make some extra shapes?

 Last edited by Sza; 02-24-2014, 06:25 PM.
Comment
-
Negatory, my pose is "bolt" upright which is actually not good. The model needs to be "relaxed" before adding an armature. Mostly it just needs to be bent at the knees a bit and tilted forward a bit on the torso. Bending at the knees is not as simple as just proportionally editing the knee geometry forward, though. I need to rotate the entire leg forward then rotate from the knee down back and then adjust the caster of the ankles/foot. The torso rotation is going to be almost non-existent. Maybe 2 or 3 degrees (with the hip as the axis), just enough to make the spine a little more relaxed.Your model is in a perfect poseComment
-
idk if the pose is good for making high poly models in 3d max or blender, okay... but its a almost perfect one for use with mudbox, and subdivision will add anough polys, trust me. The only important thing is to center the model. the top side goes a litlle bit to the front, thats why i said "almost" perfect. I guess i think what you mean but for me is a enough good low poly.
BTW: My download is almost ready....
Last edited by Sza; 02-24-2014, 08:33 PM.Comment
-
I'm glad you like it Sza. Since you seem to be my #1 fan for this lil project, when I have it rigged and unwrapped, you can be the first one to have a copy.
I'm modeling this is in blender 2.49b (lol... cause it's good enough). To make this high poly in blender should be fairly simple. Collapse the knees and elbows to a single edge, remove any other triangles (I think there are 10), subdivide and reroute some edges high poly style, subdivide again... then it can be sculpted.idk if the pose is good for making high poly models in 3d max or blenderComment
-
Thx i will be nice to sculpt a litlle bit for fun(may be i will do something bad ass who knows...), but the begin will be hard because i have forgot almost everythingOriginally posted by MadGypsy View Post. Thanks to you i have installed mudbox back after one and half year pause from sculpting
I wonder if its harder than in MB... If it takes more time.Originally posted by MadGypsy View PostComment
-
If you are just going to go straight to sculpting, then you probably don't want a rig & .blend. What file format do you want? I could make you a file to play with right now.Comment
-
I think the best format will be a obj but i think i will do this later. we have here now 6:12 am xD You can export it best as obj and i will try to do later a combat exoskelett
Last edited by Sza; 02-24-2014, 10:24 PM.Comment
Comment