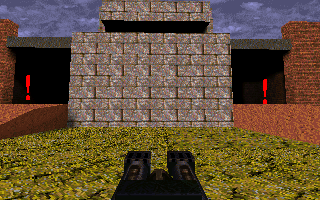
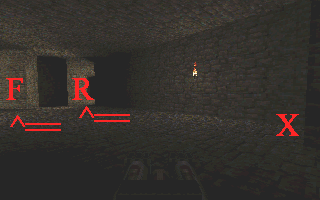
This is the opening patio to the red base, (or blue base, since
they are symmetrical). You will notice that there are two warning signs in the
corners of the base, these are potential sniper slots. If you see any sort of
red glow from these areas, be careful, and take out the snipers using circle
strafes and the nailgun. (You can knife them too, but their back is usually
facing the wall, leaving you stuck.) This is the alternate spy entrance to the
base. Use this entrance ONLY if the sniper defense in the loft is piss poor
or nonexistant. The snipers will usually transmit your skin to the defense squad
inside, then you're screwed.
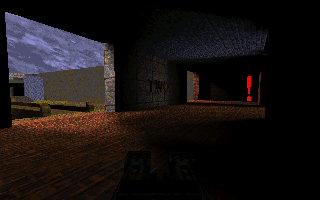
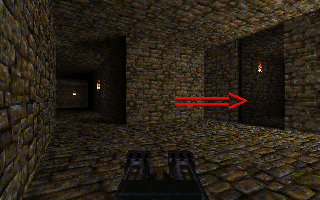
This is the main spy entrance (underwater) to the enemy base. Less chance
of getting caught, and a lot less chance of being picked off by snipers. The
only thing to watch out for is a sniper or pyro stationed at the top of the
stairs. Usually it's better to infiltrate the base when the main guards are
disrtacted (i.e. Soldiers fighting through the door.) MAKE DAMN sure you are
disguised, color and skin, before you pop your head out of the water.
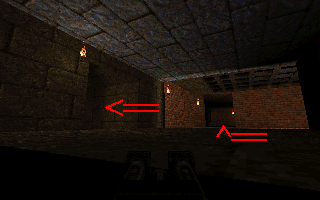
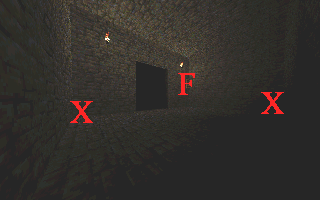
This is where the big decision is. The upper arrow is probably your best bet,
since the exit from that passage is almost invisible, and not usually watched.
Plus, you can get a good look at the sentry placement in the ramp room. The
other entrance is more dangerous, but if your sneaky you can make it look
like you're coming in for resupply.

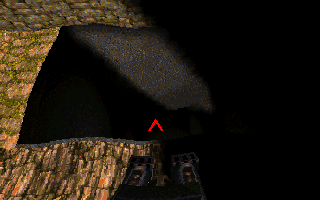
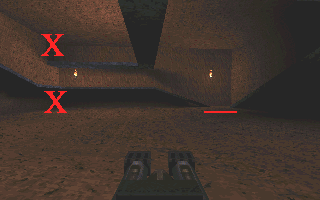
This is the corner of the rocky passage shown above. Good spies can grenade
jump to the upper respawn, but this is tricky to pull off without killing
yourself. Use this route ONLY if you're daring, or there's no other way in.
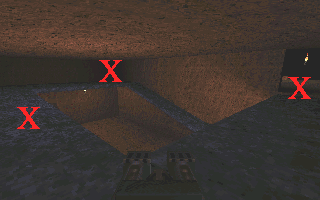
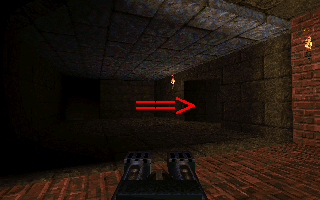
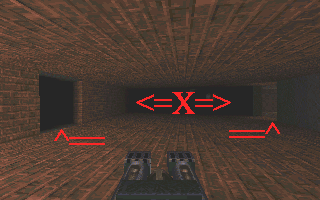
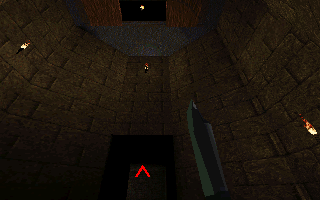
This is the infamous ramp room. The X's note usual sentry placements, and
the red line is a common pipebomb trap. On this map, this is the trial by
fire. If you can convince the defense that you are friendly, then you are
all set, and are free to roam around the base. You're first job? Take out
all the sentries you see. You can also jump to the basement through the elevator
shaft to the right in the lower picture.
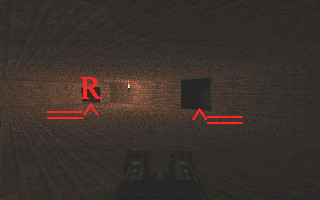
Commonly referred to as the upper room, this is the command denter of the
entire base. Once again, the X refers to a common sentry area. The R leads
to the respawn room. If that door is ever open, chuck gas inside. The door
to the right of the respawn goes to the sniper loft. The other door heads
to the basement. Behind the X lies a third door, which leads to the grate
above the entrance. This is an easy escape route when a flag is in your possesion.
Just remember to use the water stairs when escaping this way, and swim home.
Less chance of a sniper taking you out. Interesting tip from Vaguely
Swanky: Wait till ppl are in upper ammo supply, and throw a gas grenade
in there. Back up 3/4 of the way to the wall opposite the ammo room and throw
another gas gernade. NOW.....when they come out of the upper ammo room hallucinating,
they will run right into more of your nice gas.
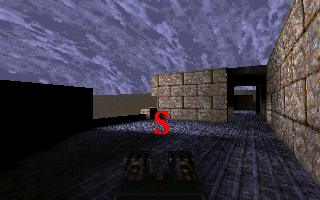
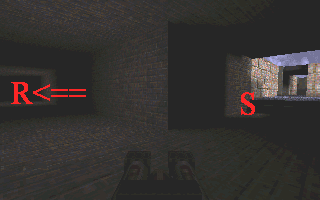
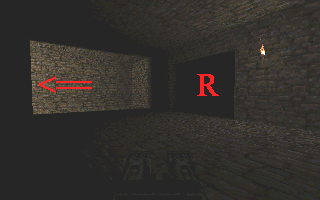
Ahh. Spy heaven. The sniper loft. S's are sniper positions. The R points to
the sniper respawn area. WATCH FOR SNIPERS hanging out in the shadows in the
lower picture. And toss gas into the respawn room for some fun.
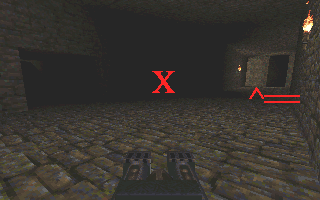
This is the opening basement area, if you came down through the tunnel. The
X's are sentries, And the arrows lead to the flag and respawn areas. Take
out these sentries. Mucho Importante.
Flag time! X's are sentries. Watch for sentries in the hallway too. When the
room is clear, grab the flag and hightail it out. Watch for patrols. They frequent
this area. Also watch for pissy engineers.
(They get that way when you blow their sentries)
If you came down the elevator shaft, this is what you will see. If the Respawn
is open, toss gas, and follow the arrow to the key room. Remember to take out
sentries first. Its easier to toss grenades when you aren't dodging rockets
and nails.
